Hexo博客指南|第八篇:Icarus配置 - 用户评论插件
本文介绍Icarus 3支持的用户评论插件的安装配置。
畅言
安装指南
复制
appid与conf的值到主题配置的对应配置项中。
例如,如下的HTML代码:畅言安装代码 >folded 1
2
3
4
5
6
7
8
9<!--PC版-->
<div id="SOHUCS" sid="..."></div>
<script charset="utf-8" type="text/javascript" src="https://cy-cdn.kuaizhan.com/upload/changyan.js" ></script>
<script type="text/javascript">
window.changyan.api.config({
appid: '????appid????',
conf: 'prod_xxxxxxxxxxxxxxxxxxxxxxx'
});
</script>对应到主题配置为:
themes/icarus/_config.yml 1
2
3
4comment:
type: changyan
app_id: ????appid????
conf: prod_xxxxxxxxxxxxxxxxxxxxxxx
Disqus
首先,登录Disqus。
点击首页的“开始”(GET STARTED)按钮或者访问
此处并点击“我想要将Disqus安装到我的站点”
(I want to install Disqus on my site)来创建新的站点评论服务。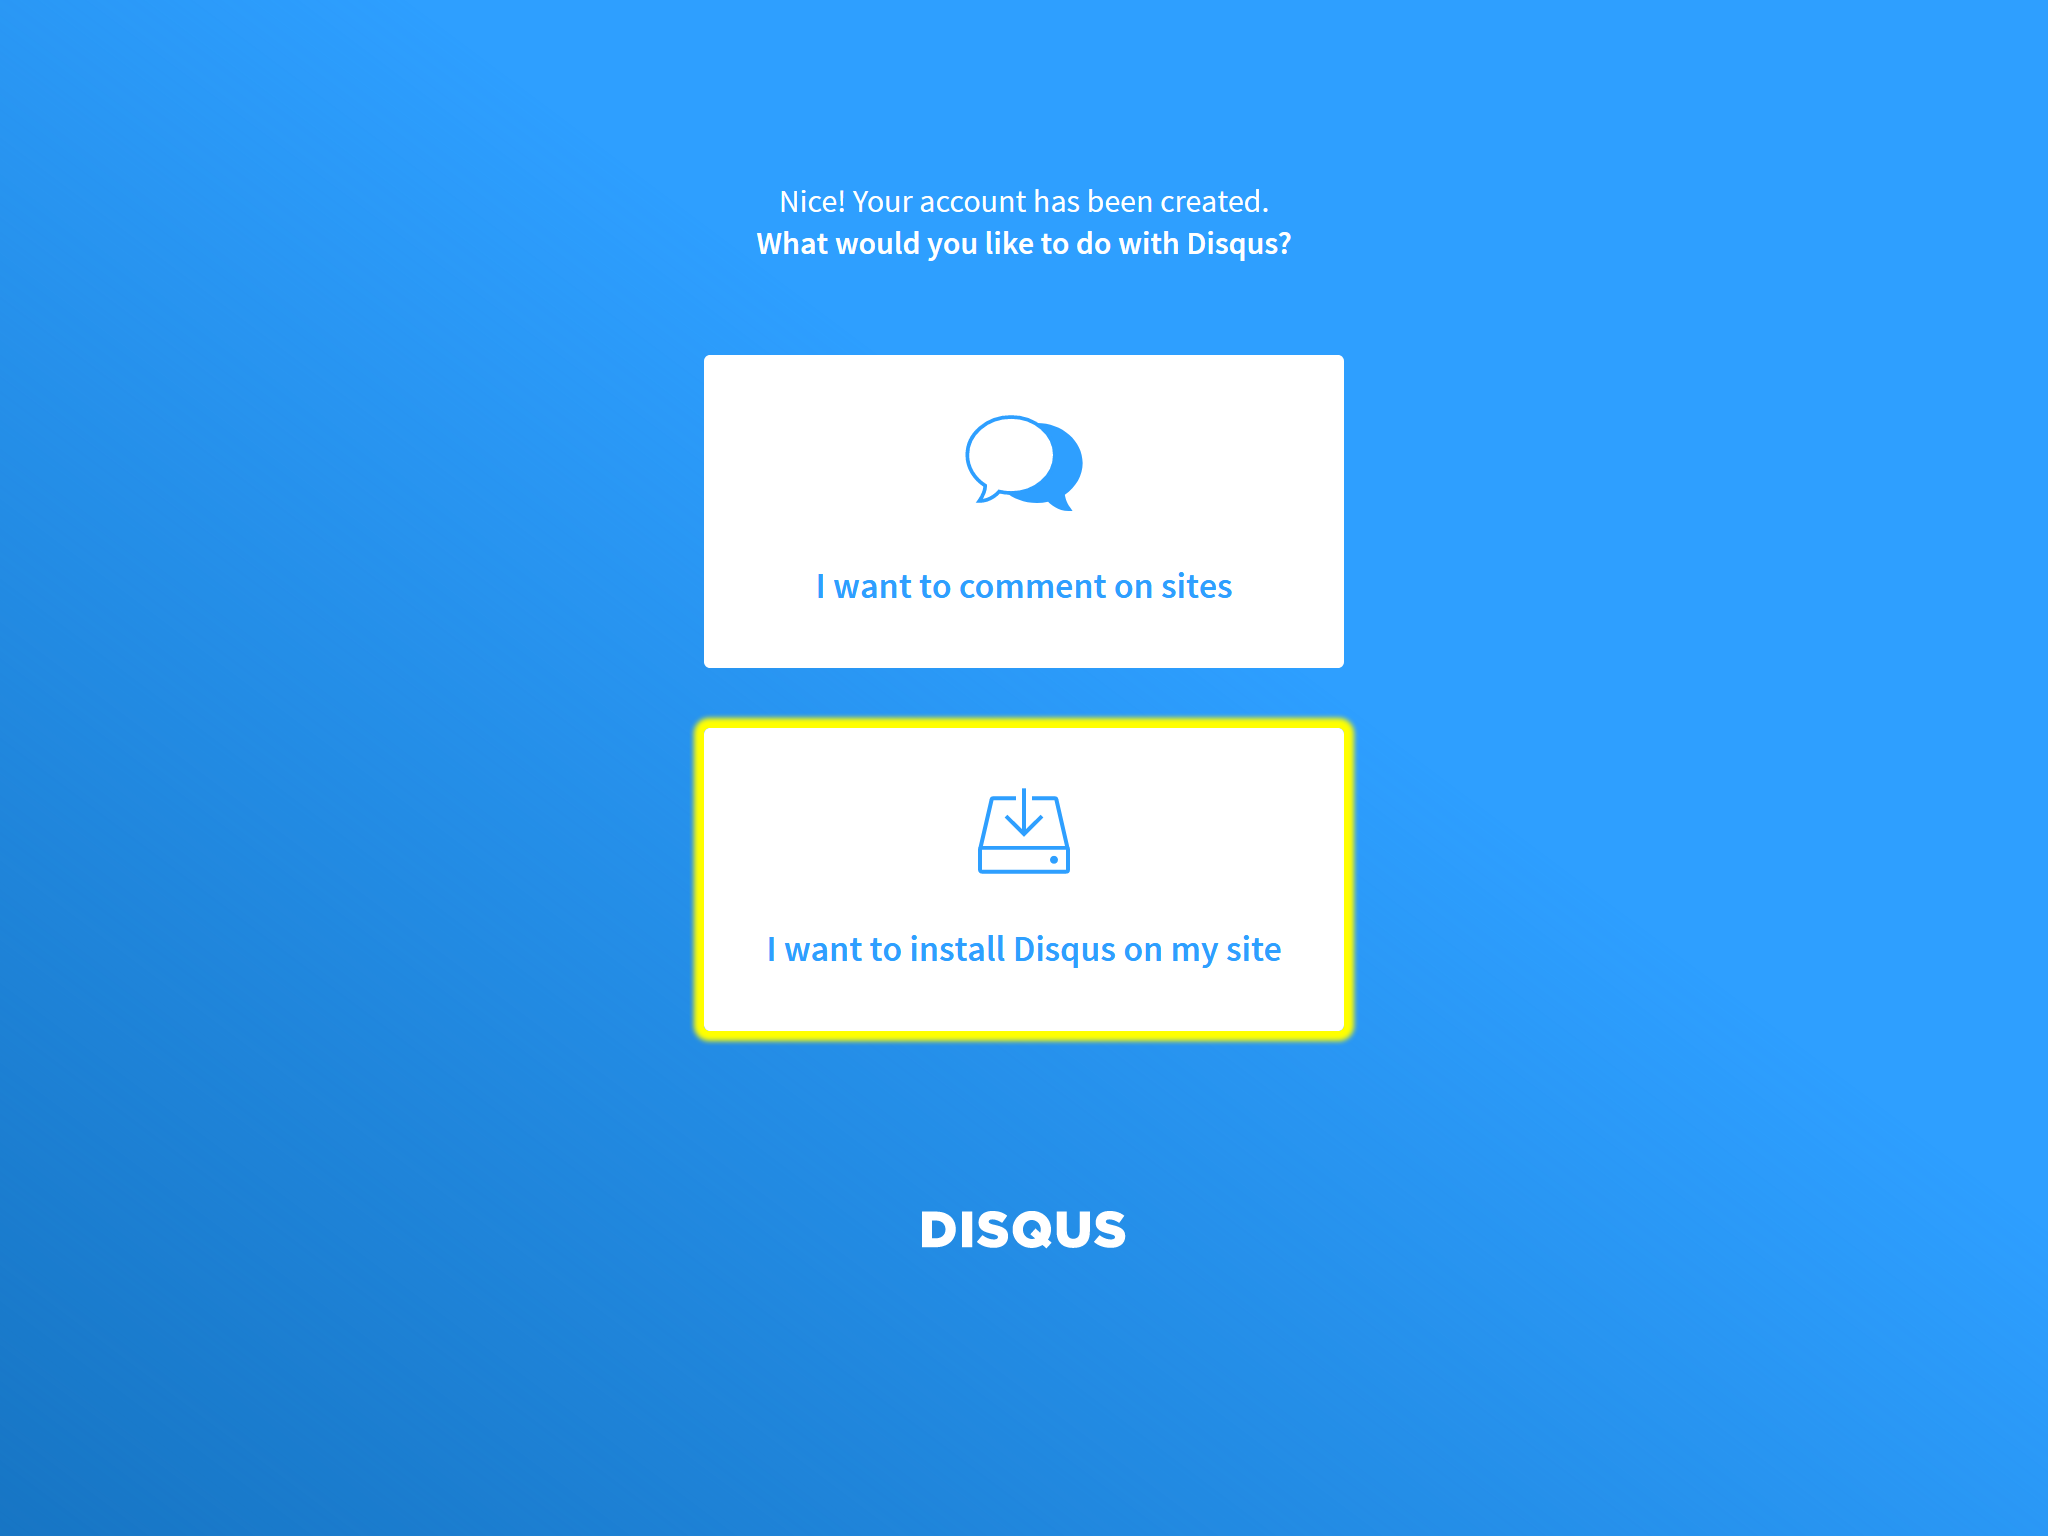
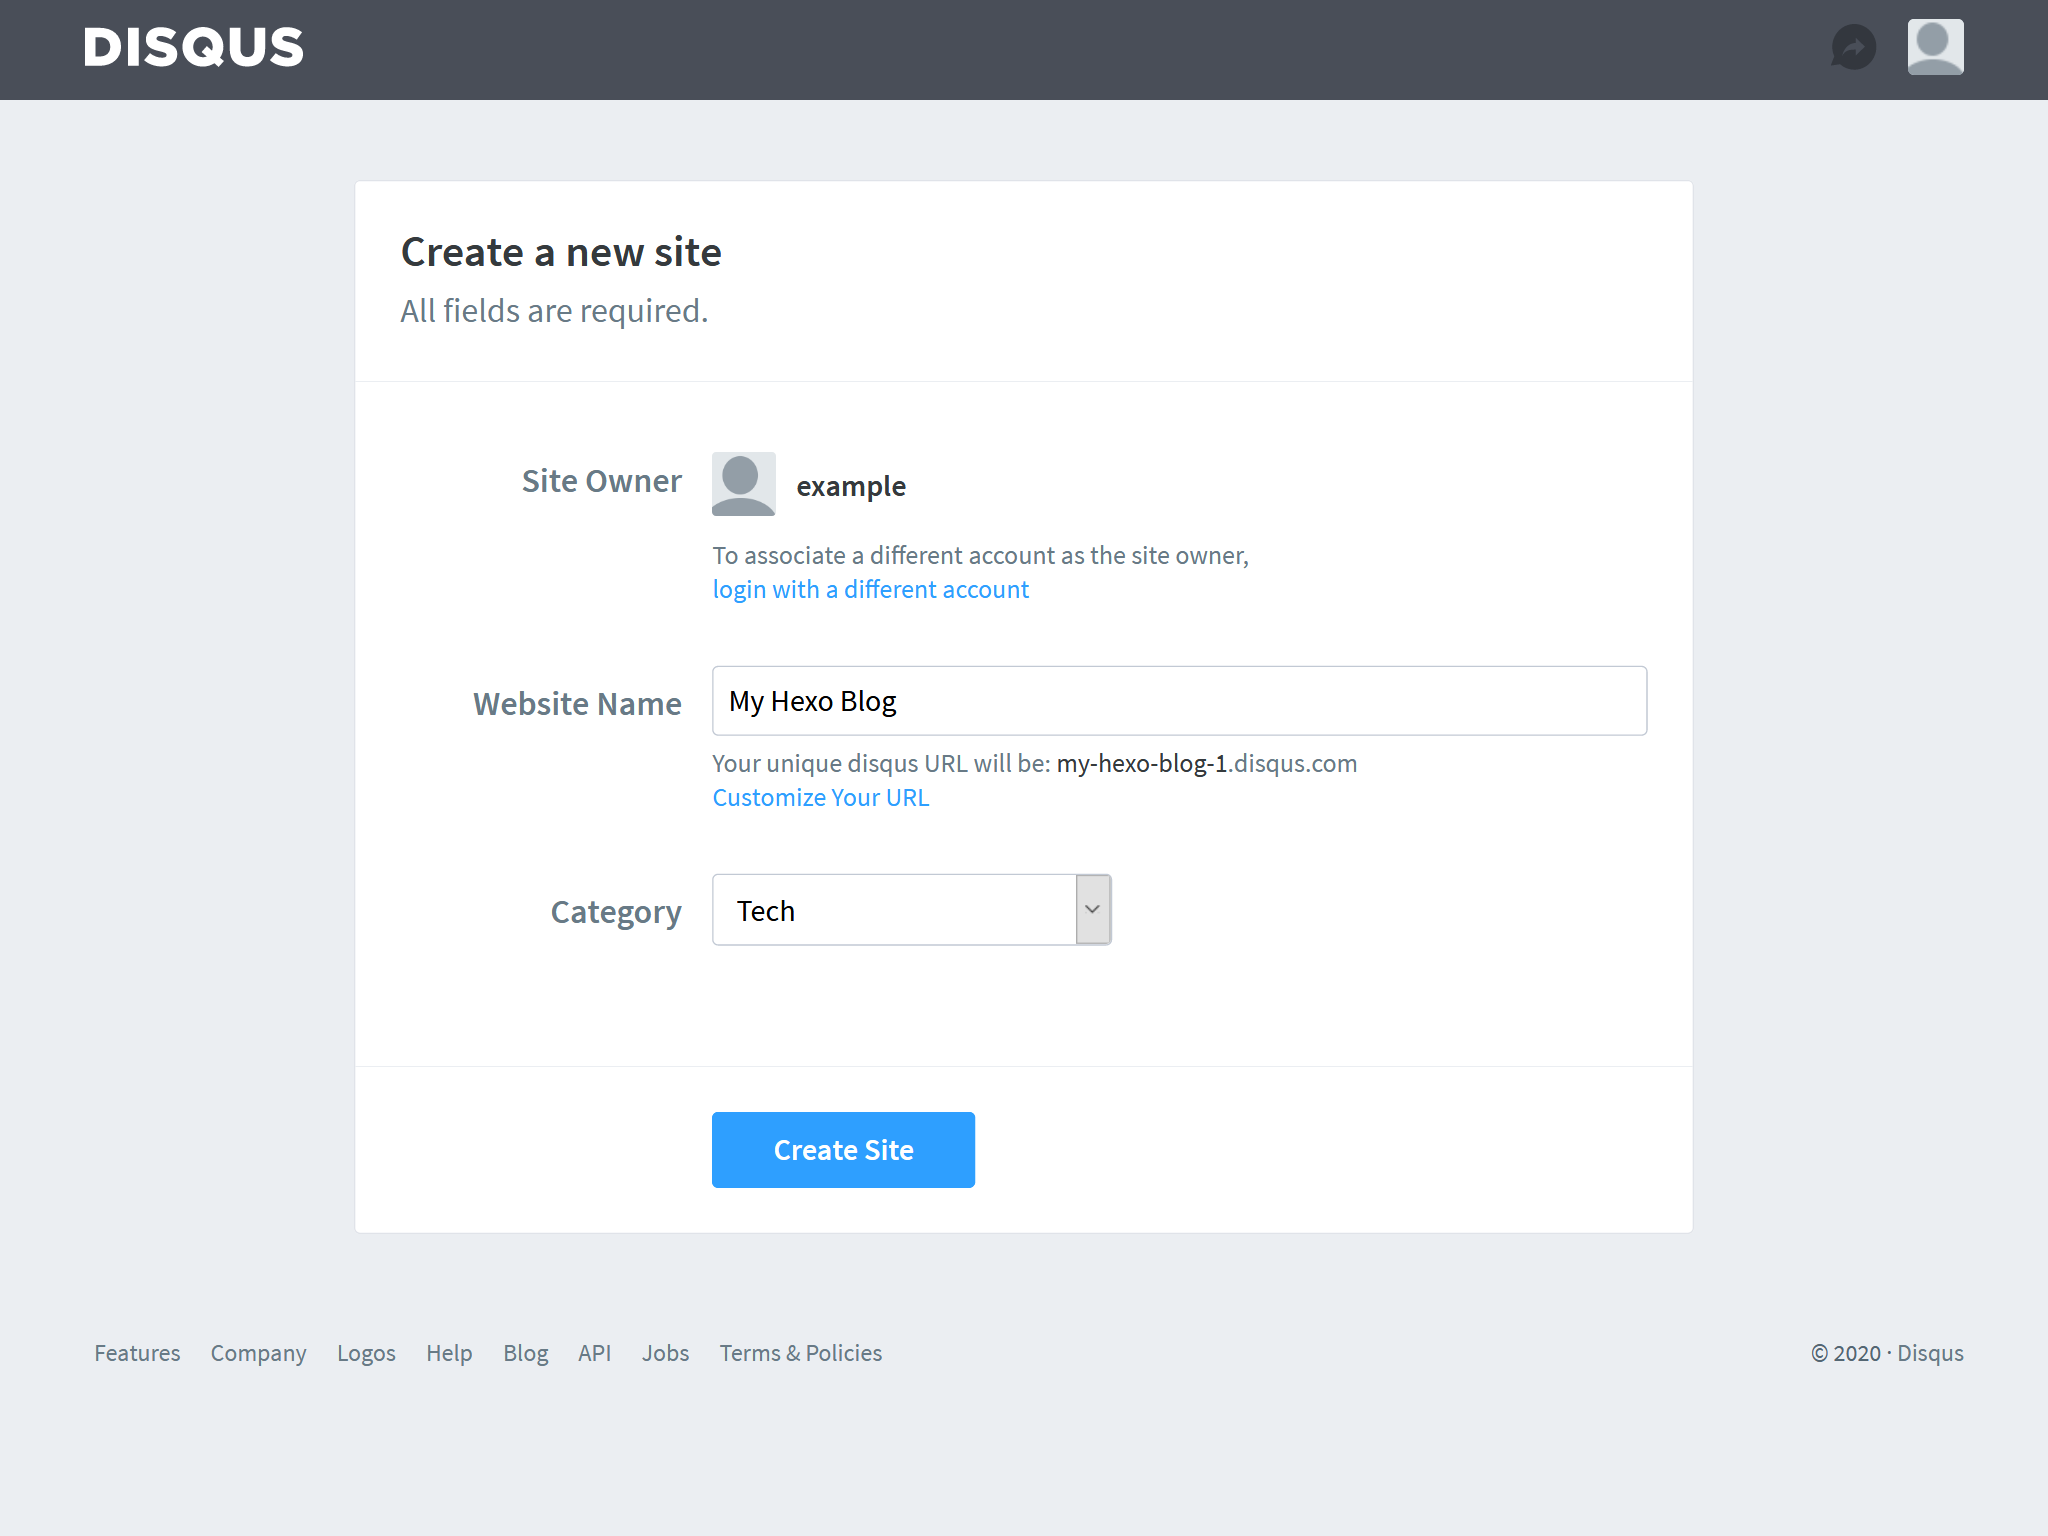
在创建新站点页面中填写“网站名称”(Website Name)以及“网站类型”(Category),然后点击“创建站点”(Create Site)。
如果你愿意的话,选择一个付费订阅。
你也可以点击左侧的“安装Disqus”(Install Disqus)来跳过此步。下一步,选择Disqus的安装平台。
此处选择页面底部的“上面没有列出我使用的平台,使用通用代码安装”
(I don’t see my platform listed, install manually with Universal Code)。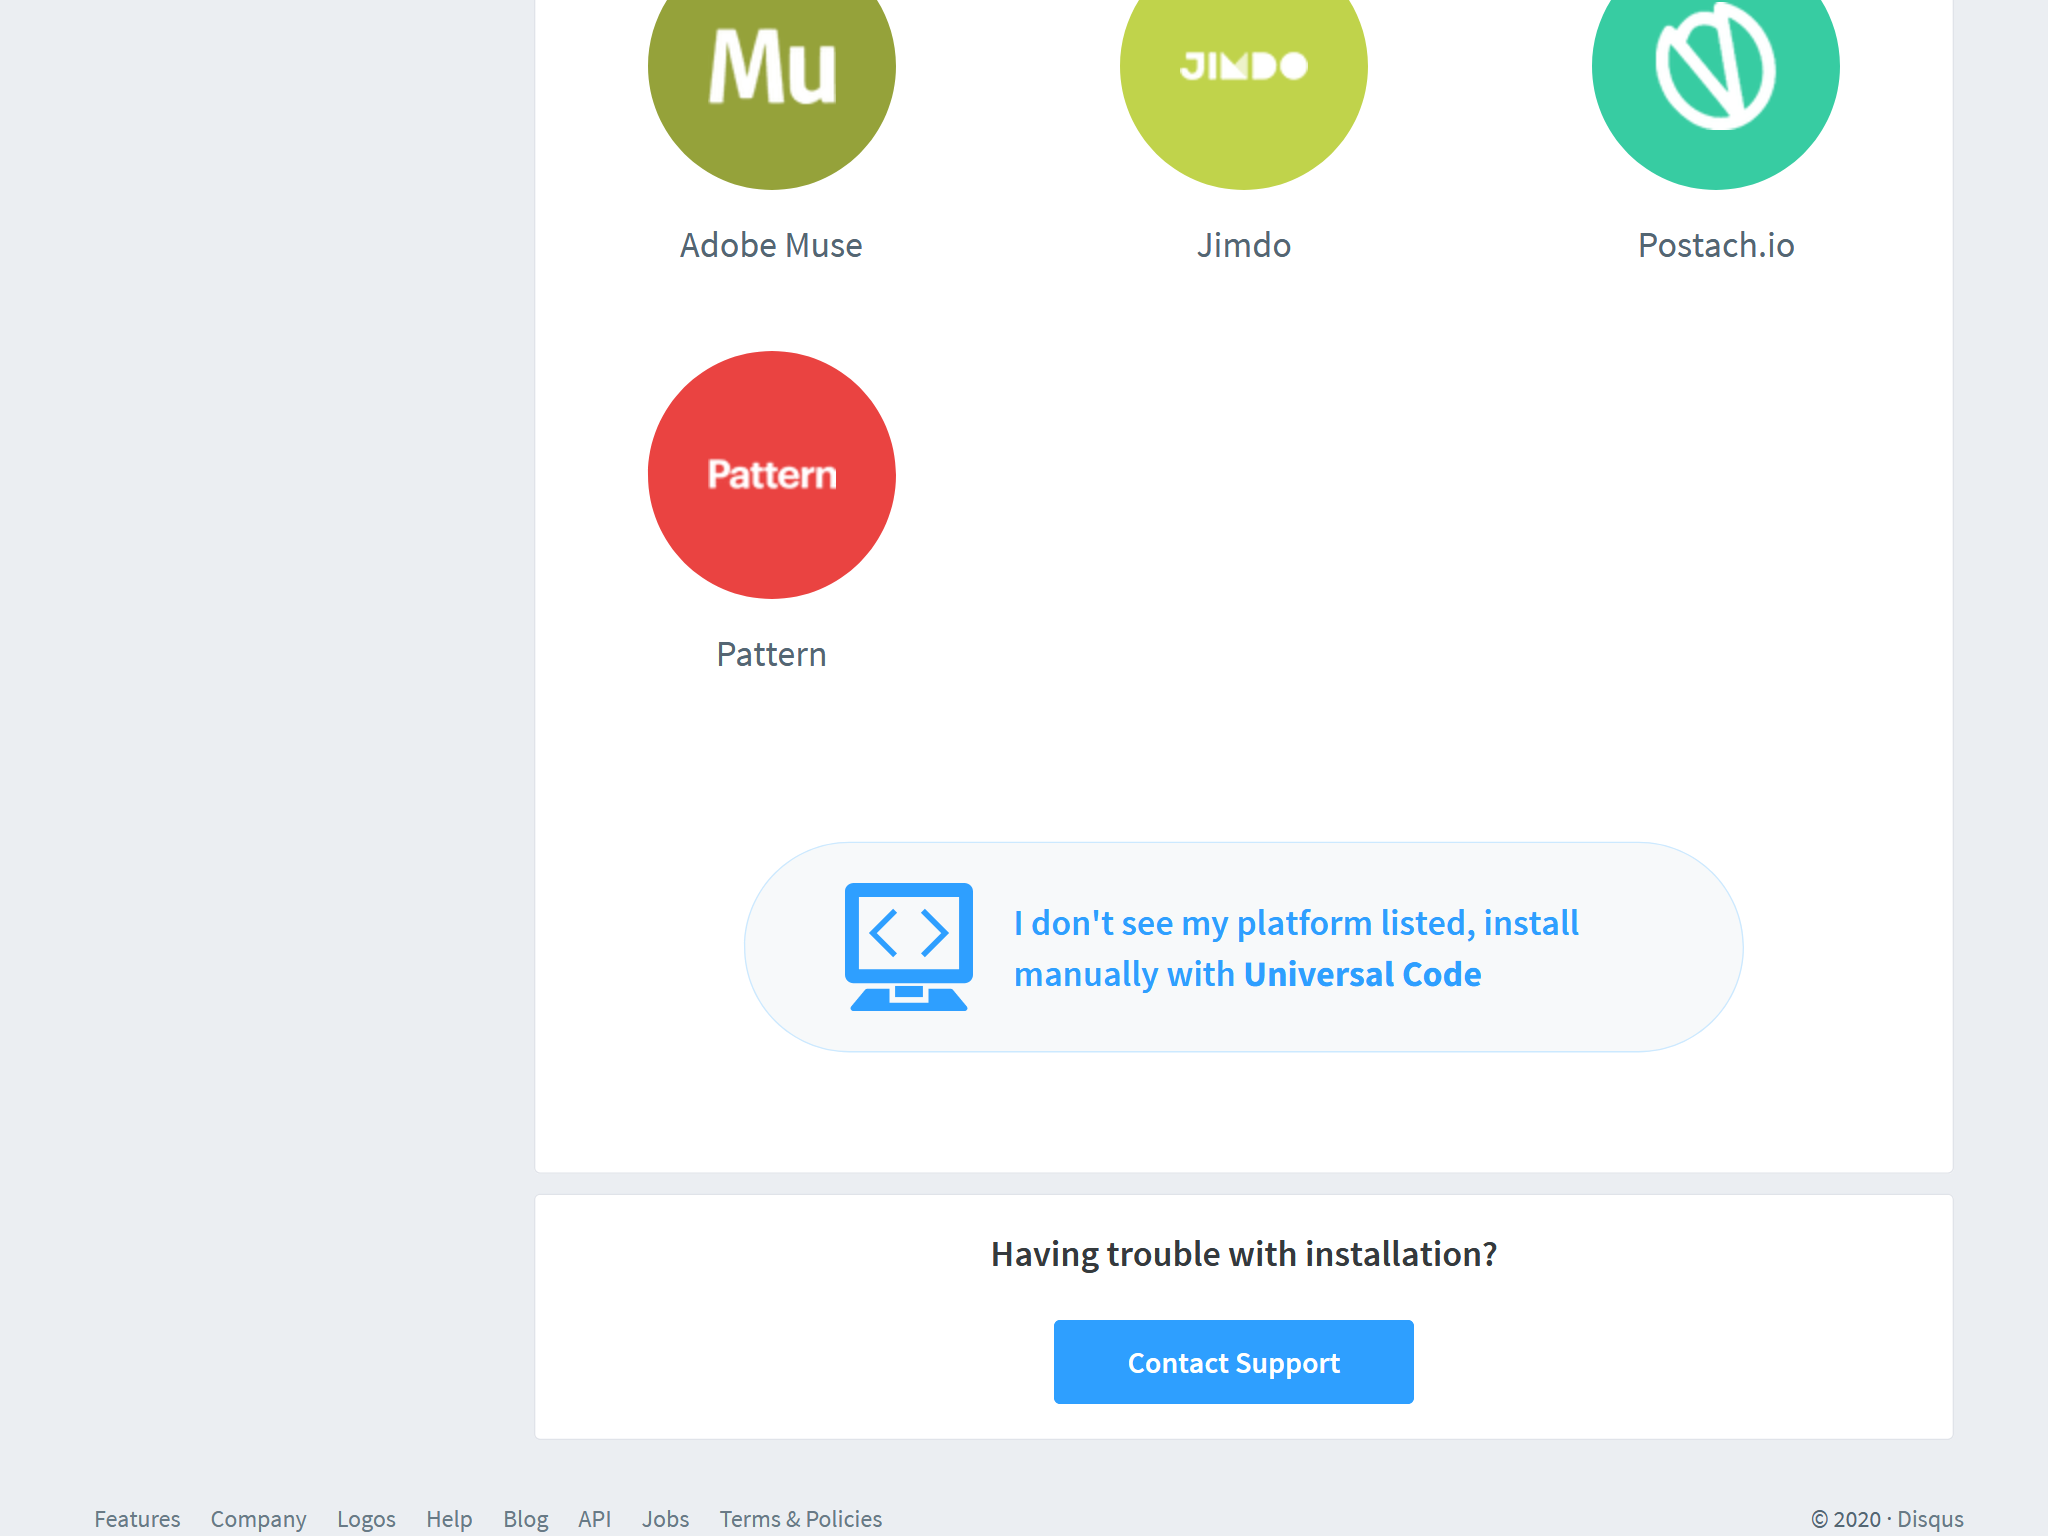
点击页面底部的“配置”(Configure)按钮跳过“通用代码安装指南”(Universal Code install instructions)。
在“配置Disqus”(Configure Disqus)页面中按需填写Disqus个性化配置。
然后,点击“完成安装”(Complete Setup)和“关闭配置”(Dismiss Setup)按钮来结束配置。下一步,在评论服务首页的右上角点击“编辑配置”(Edit Settings)按钮。
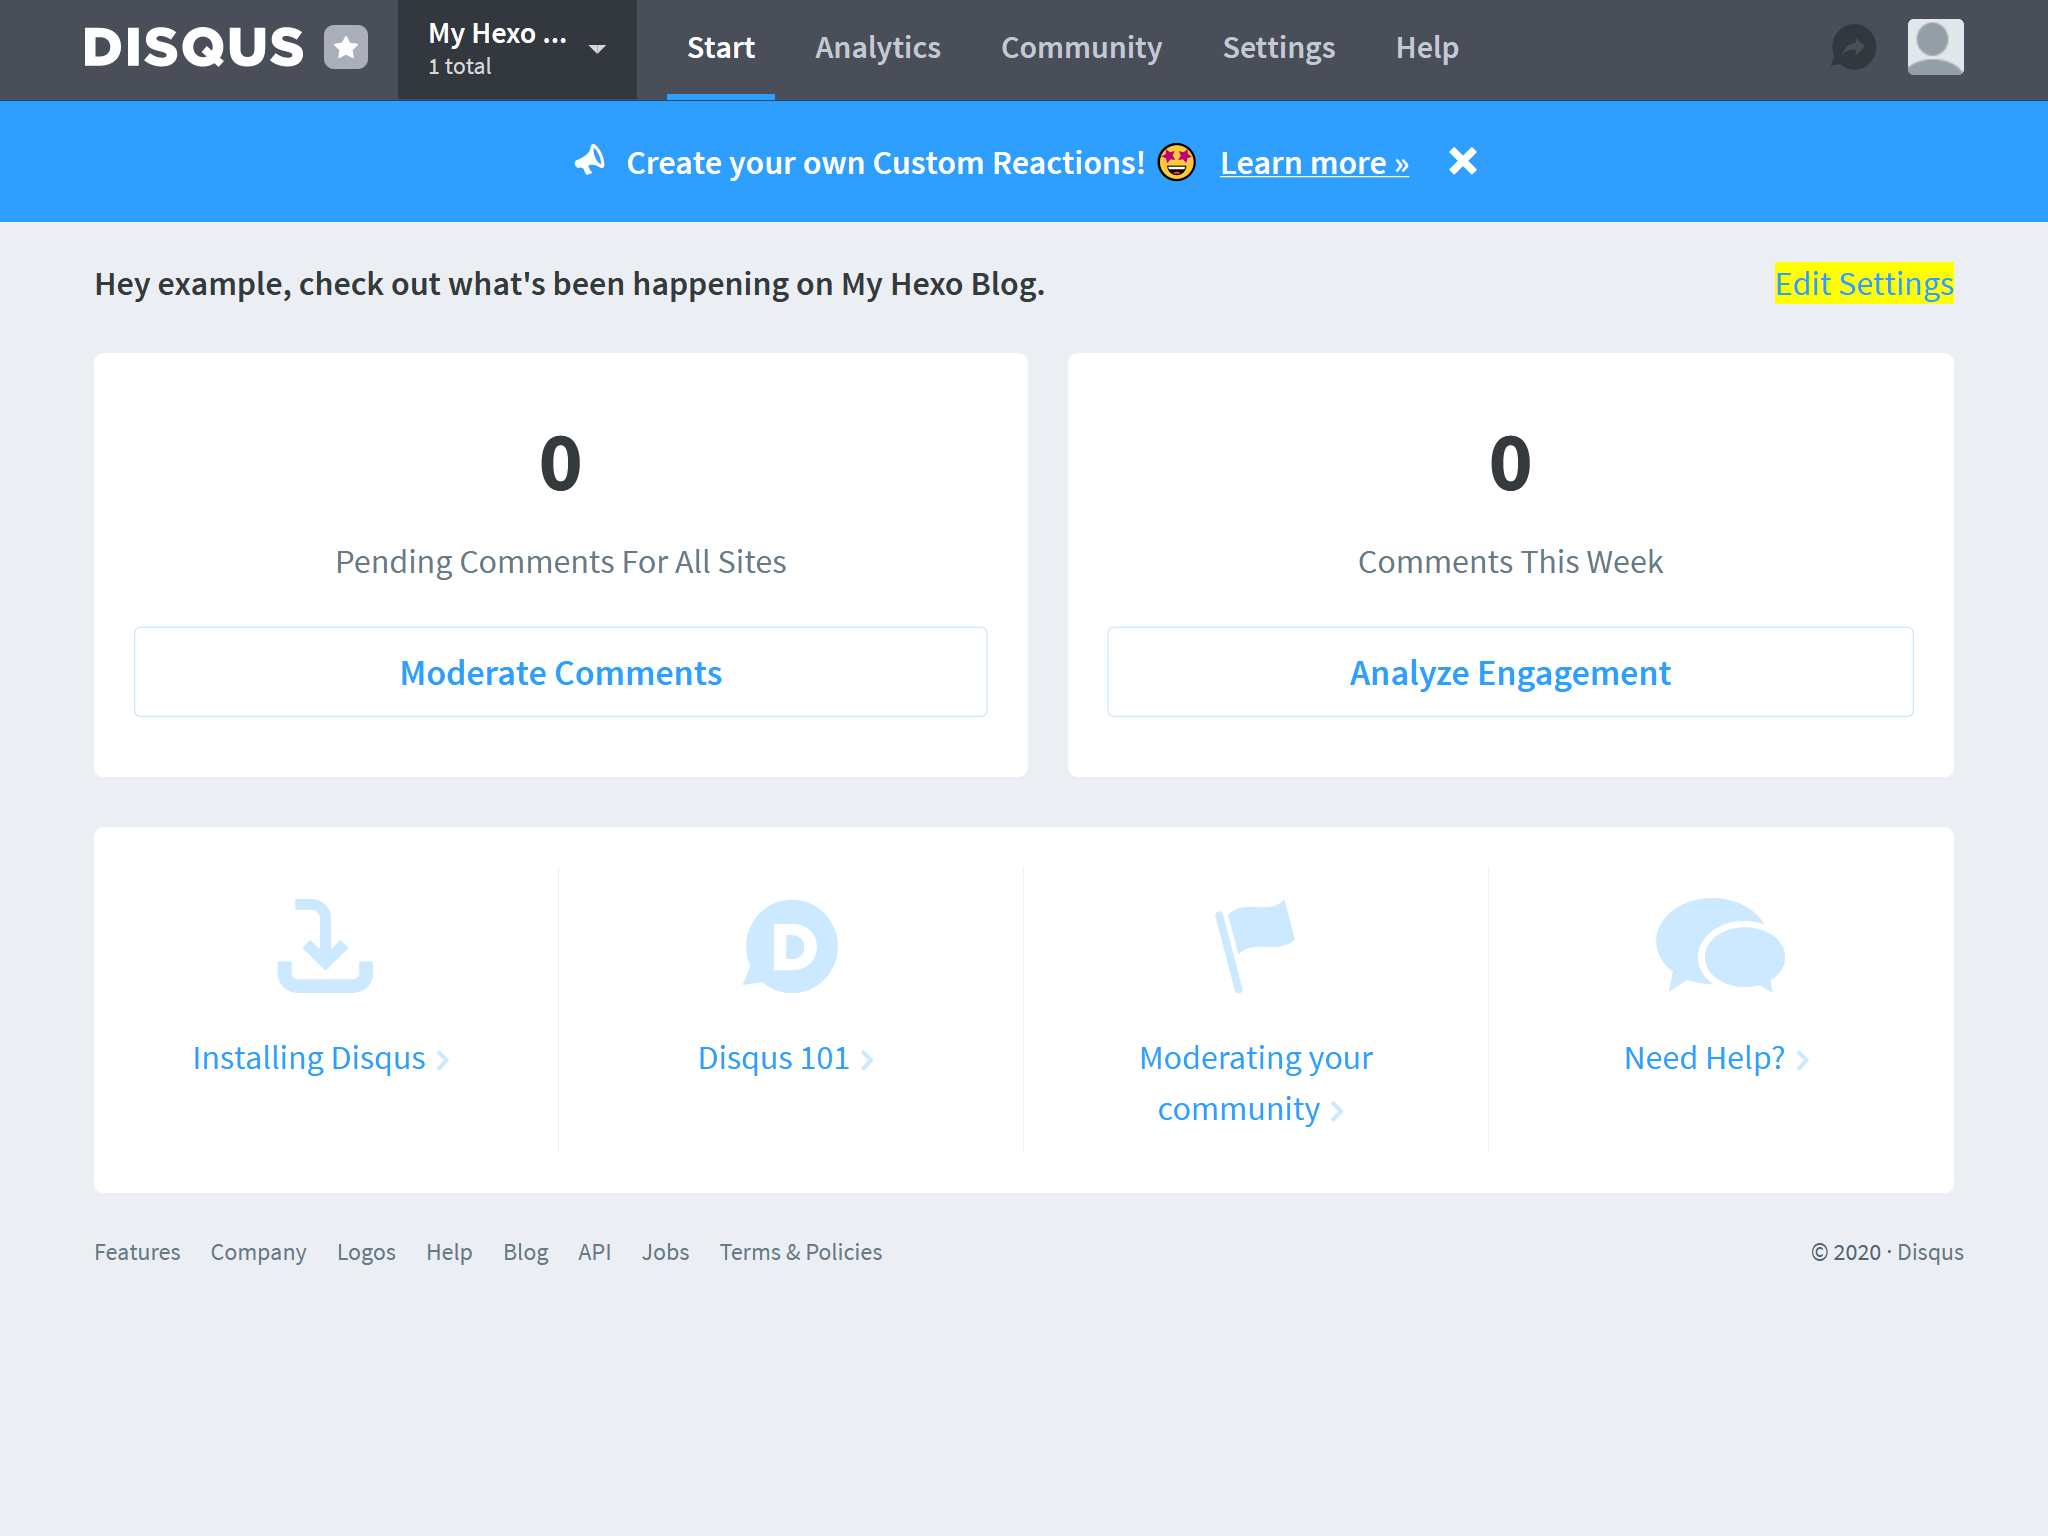
在“为你的站点配置Disqus”(Configure Disqus for Your Site)页面上找到“Shortname”的值,
复制到主题配置的评论配置项中。
例如,下面截图中的“Shortname”为my-hexo-blog-1: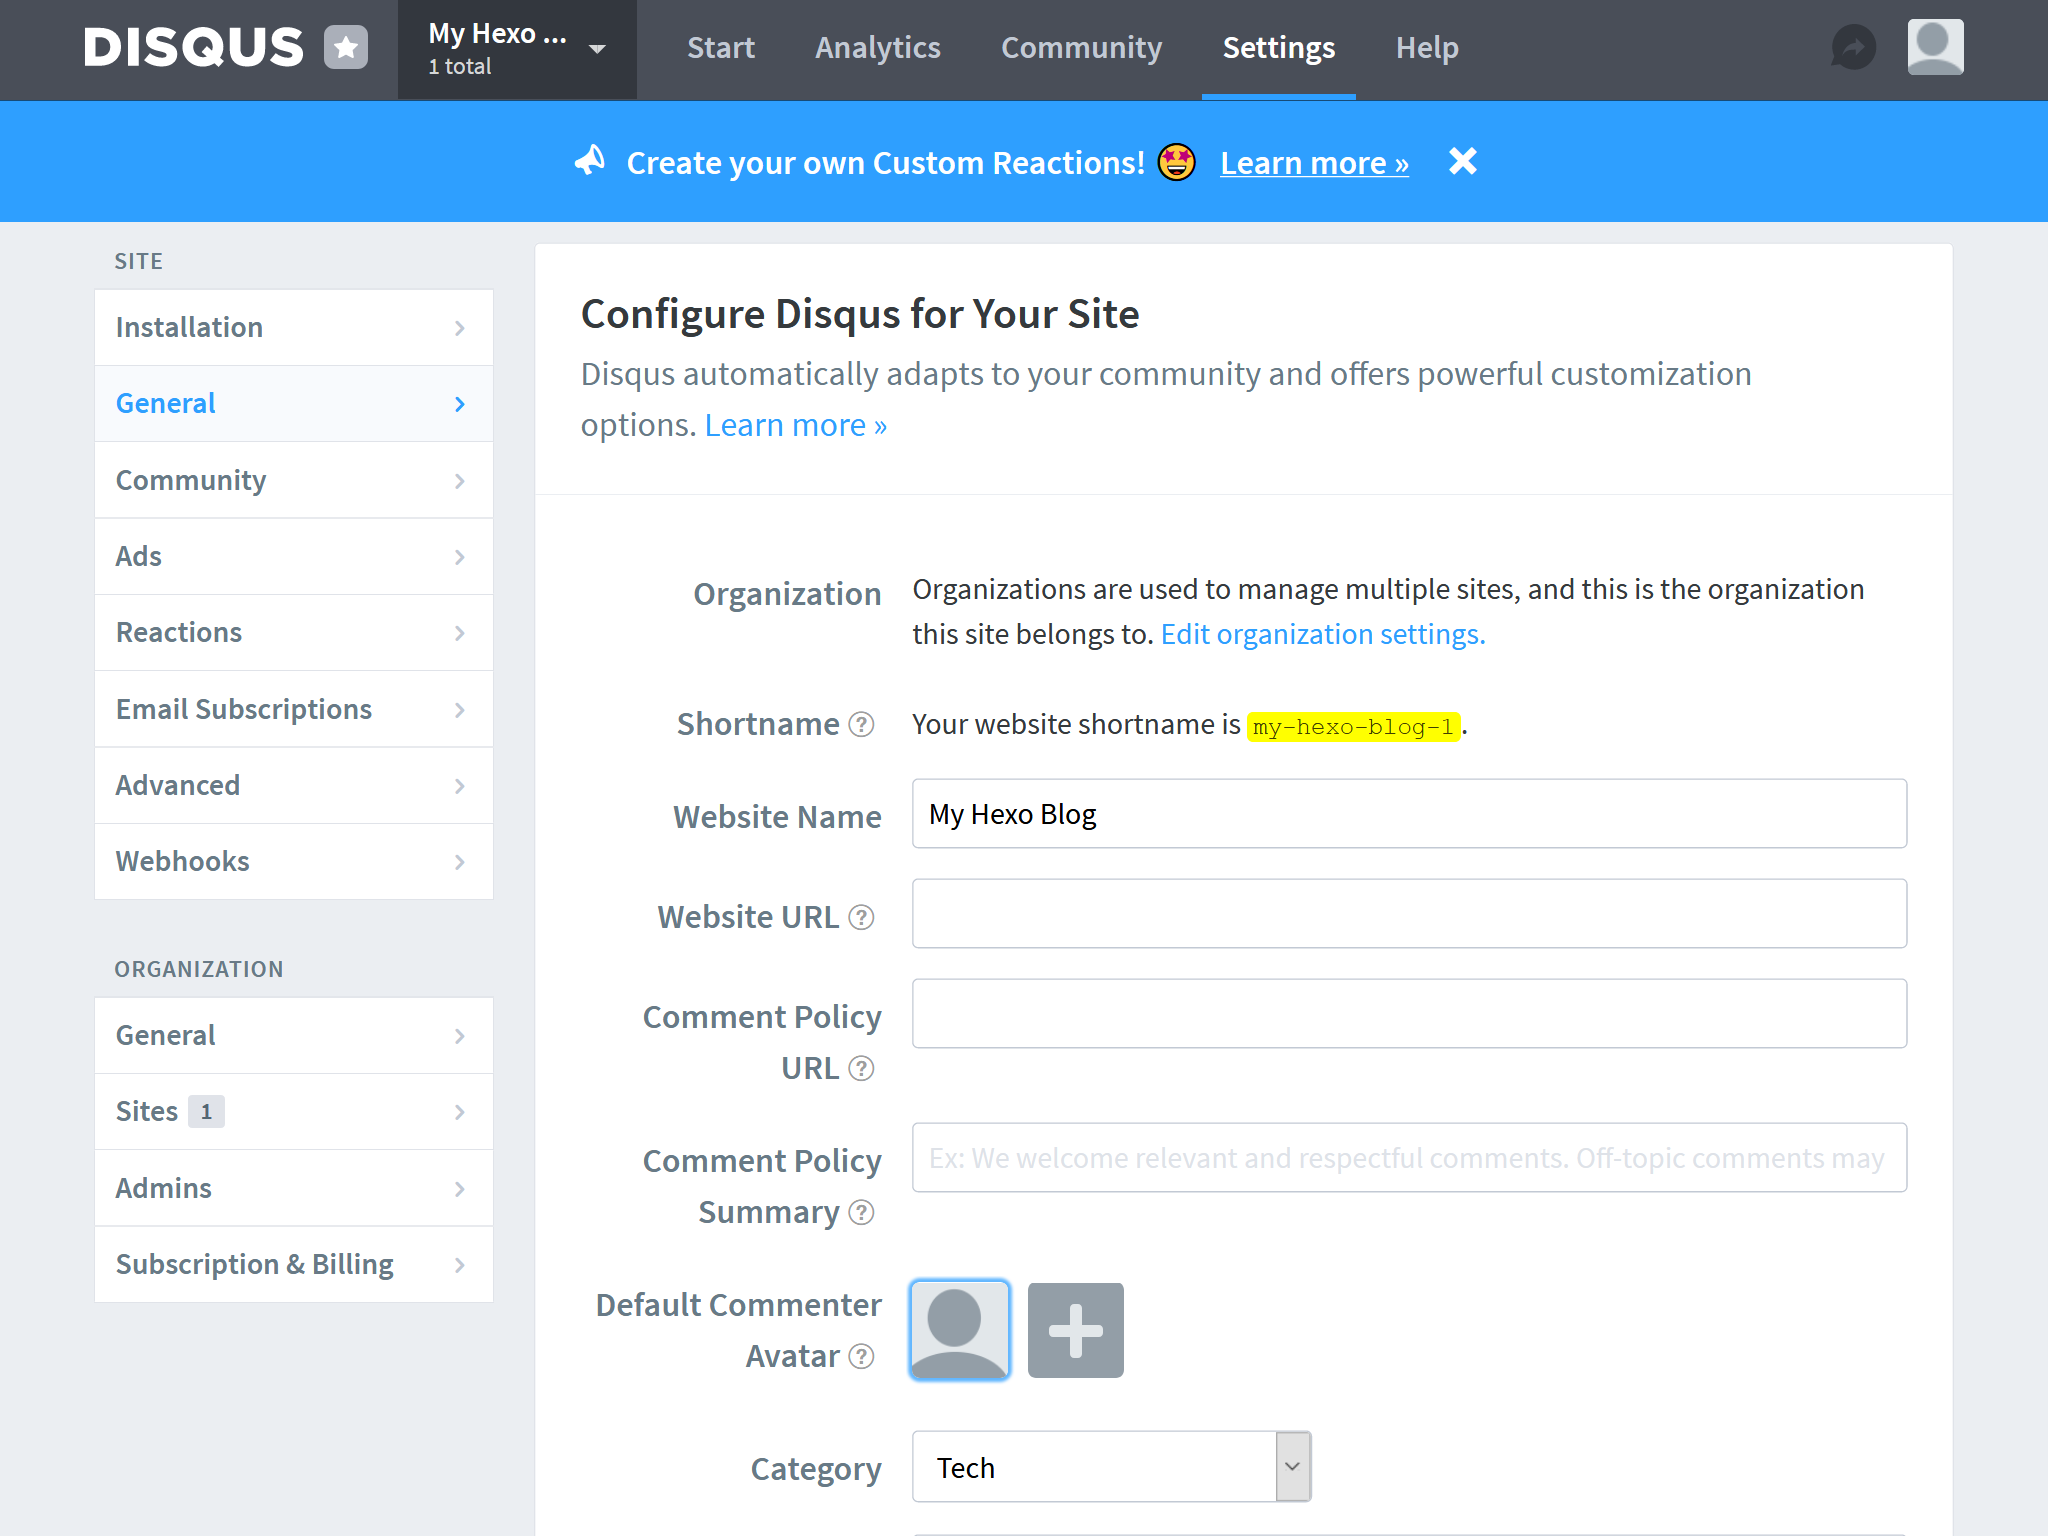
对应的主题配置为:
themes/icarus/_config.yml 1
2
3comment:
type: disqus
shortname: my-hexo-blog-1(可选)你可以在文章的front-matter中加入
disqusId来为文章添加Disqus唯一标识。
这样,你可以在未来更改文章的位置而不会丢失所有评论。source/_post/some-post.md 1
2
3
4
5title: 我的第一篇文章
date: 2015-01-01 00:00:01
disqusId: some-disqus-id
---
# Hello world
DisqusJS
在Disqus服务访问受限的地区可使用DisqusJS作为替代。
关于DisqusJS的配置过程可参考https://github.com/SukkaW/DisqusJS。
登录Disqus并访问此链接。
点击“注册新应用”(Register new application)或者“注册应用”(registering an application)来创建新的Disqus应用。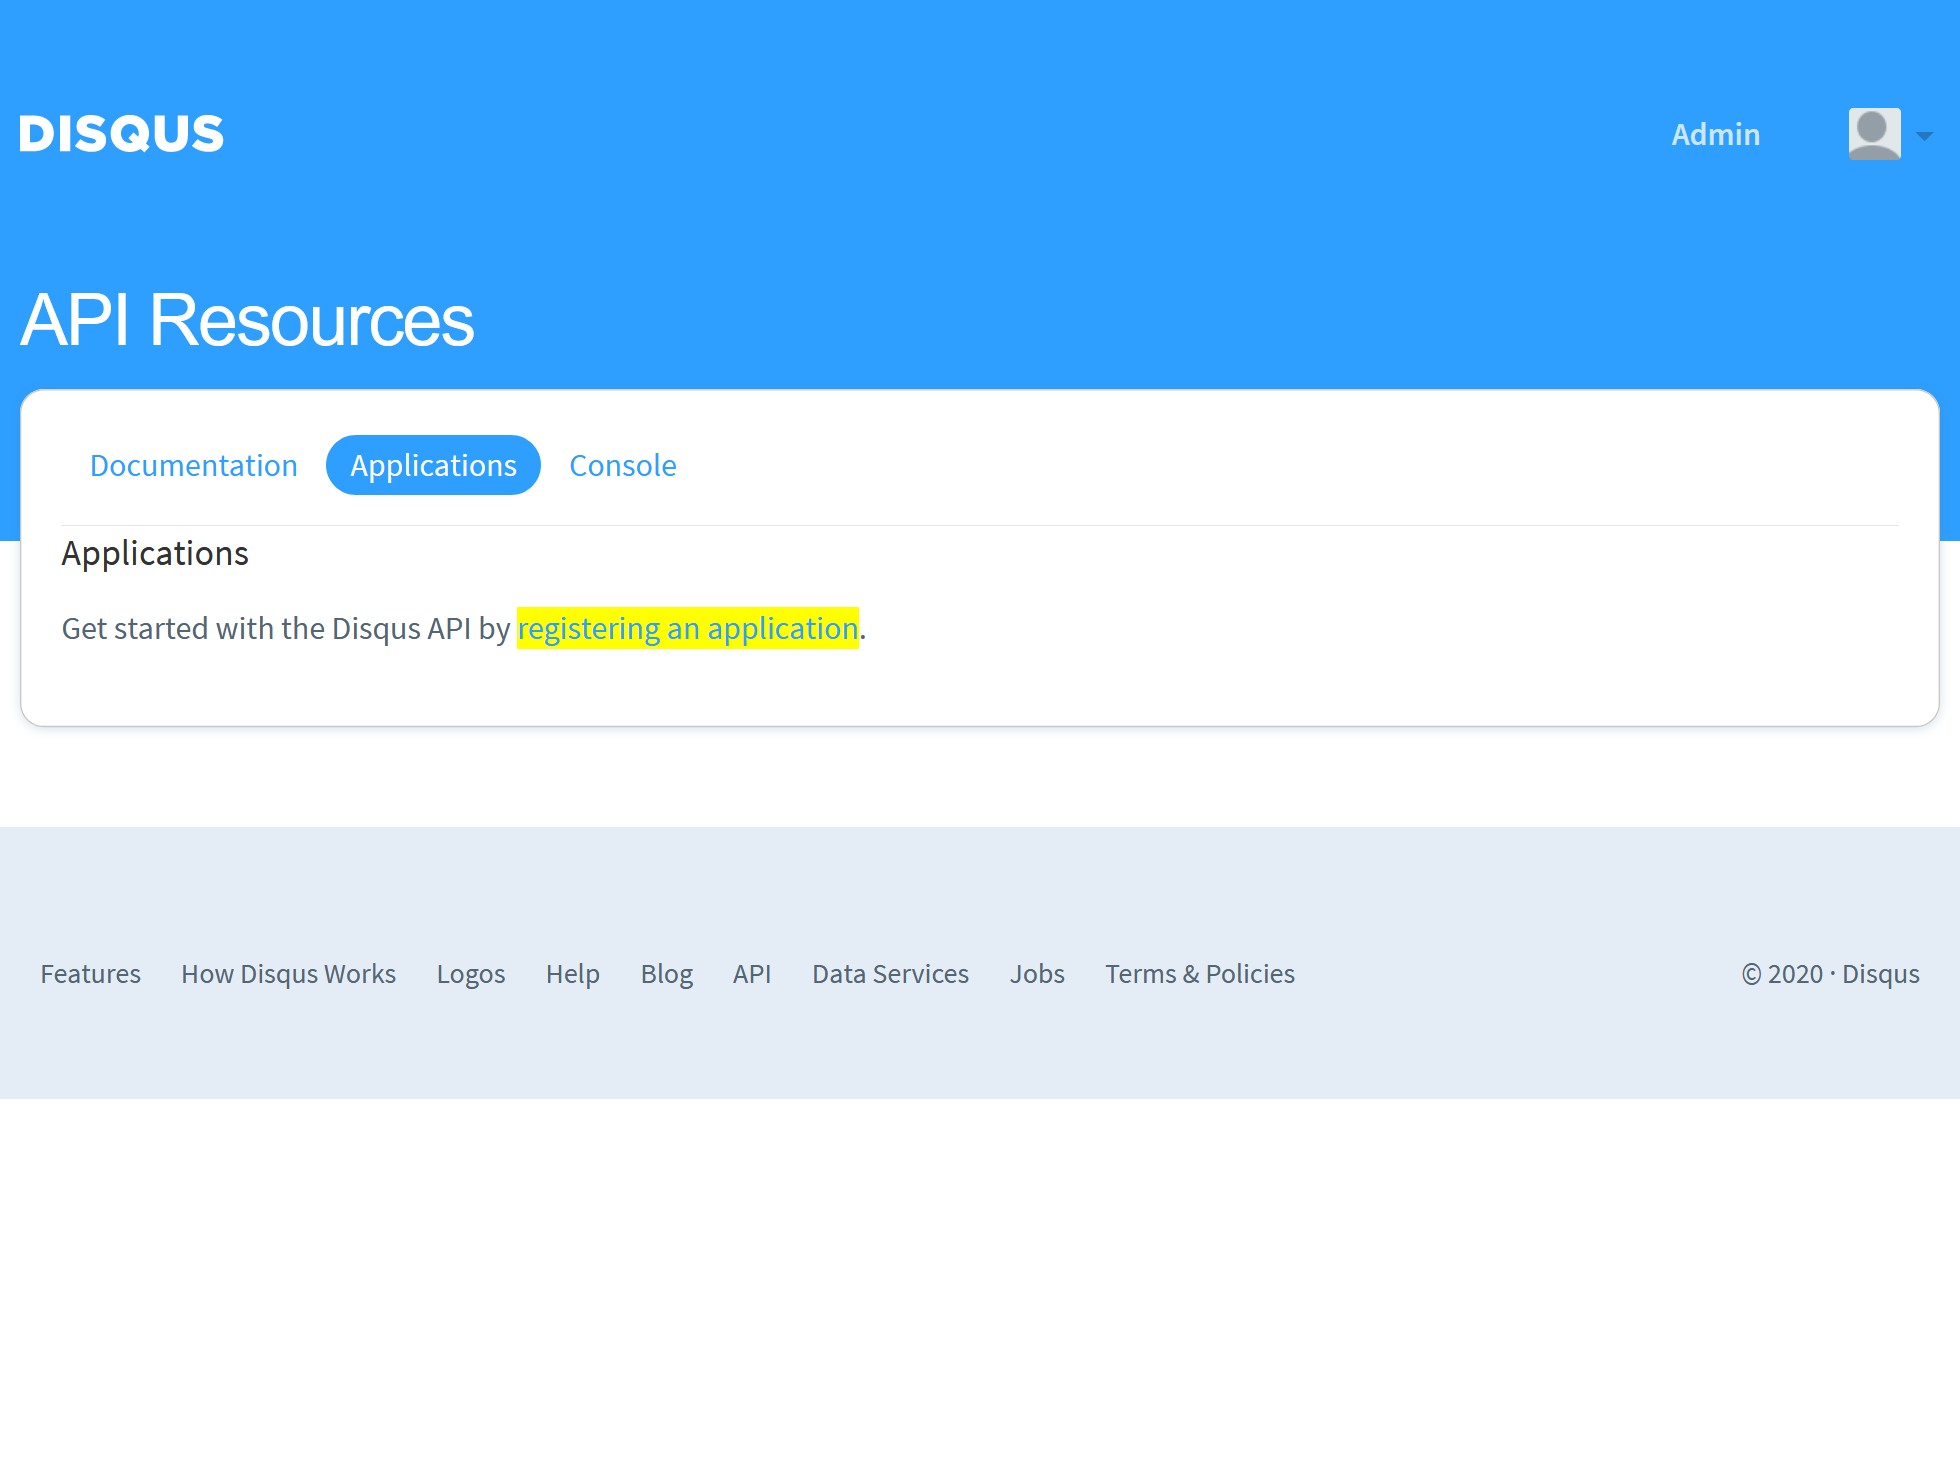
在下一页面中填写”应用名称“(Label),”介绍“(Description),以及”网站地址“(Website)。
然后点击“注册我的应用”(Register my application)。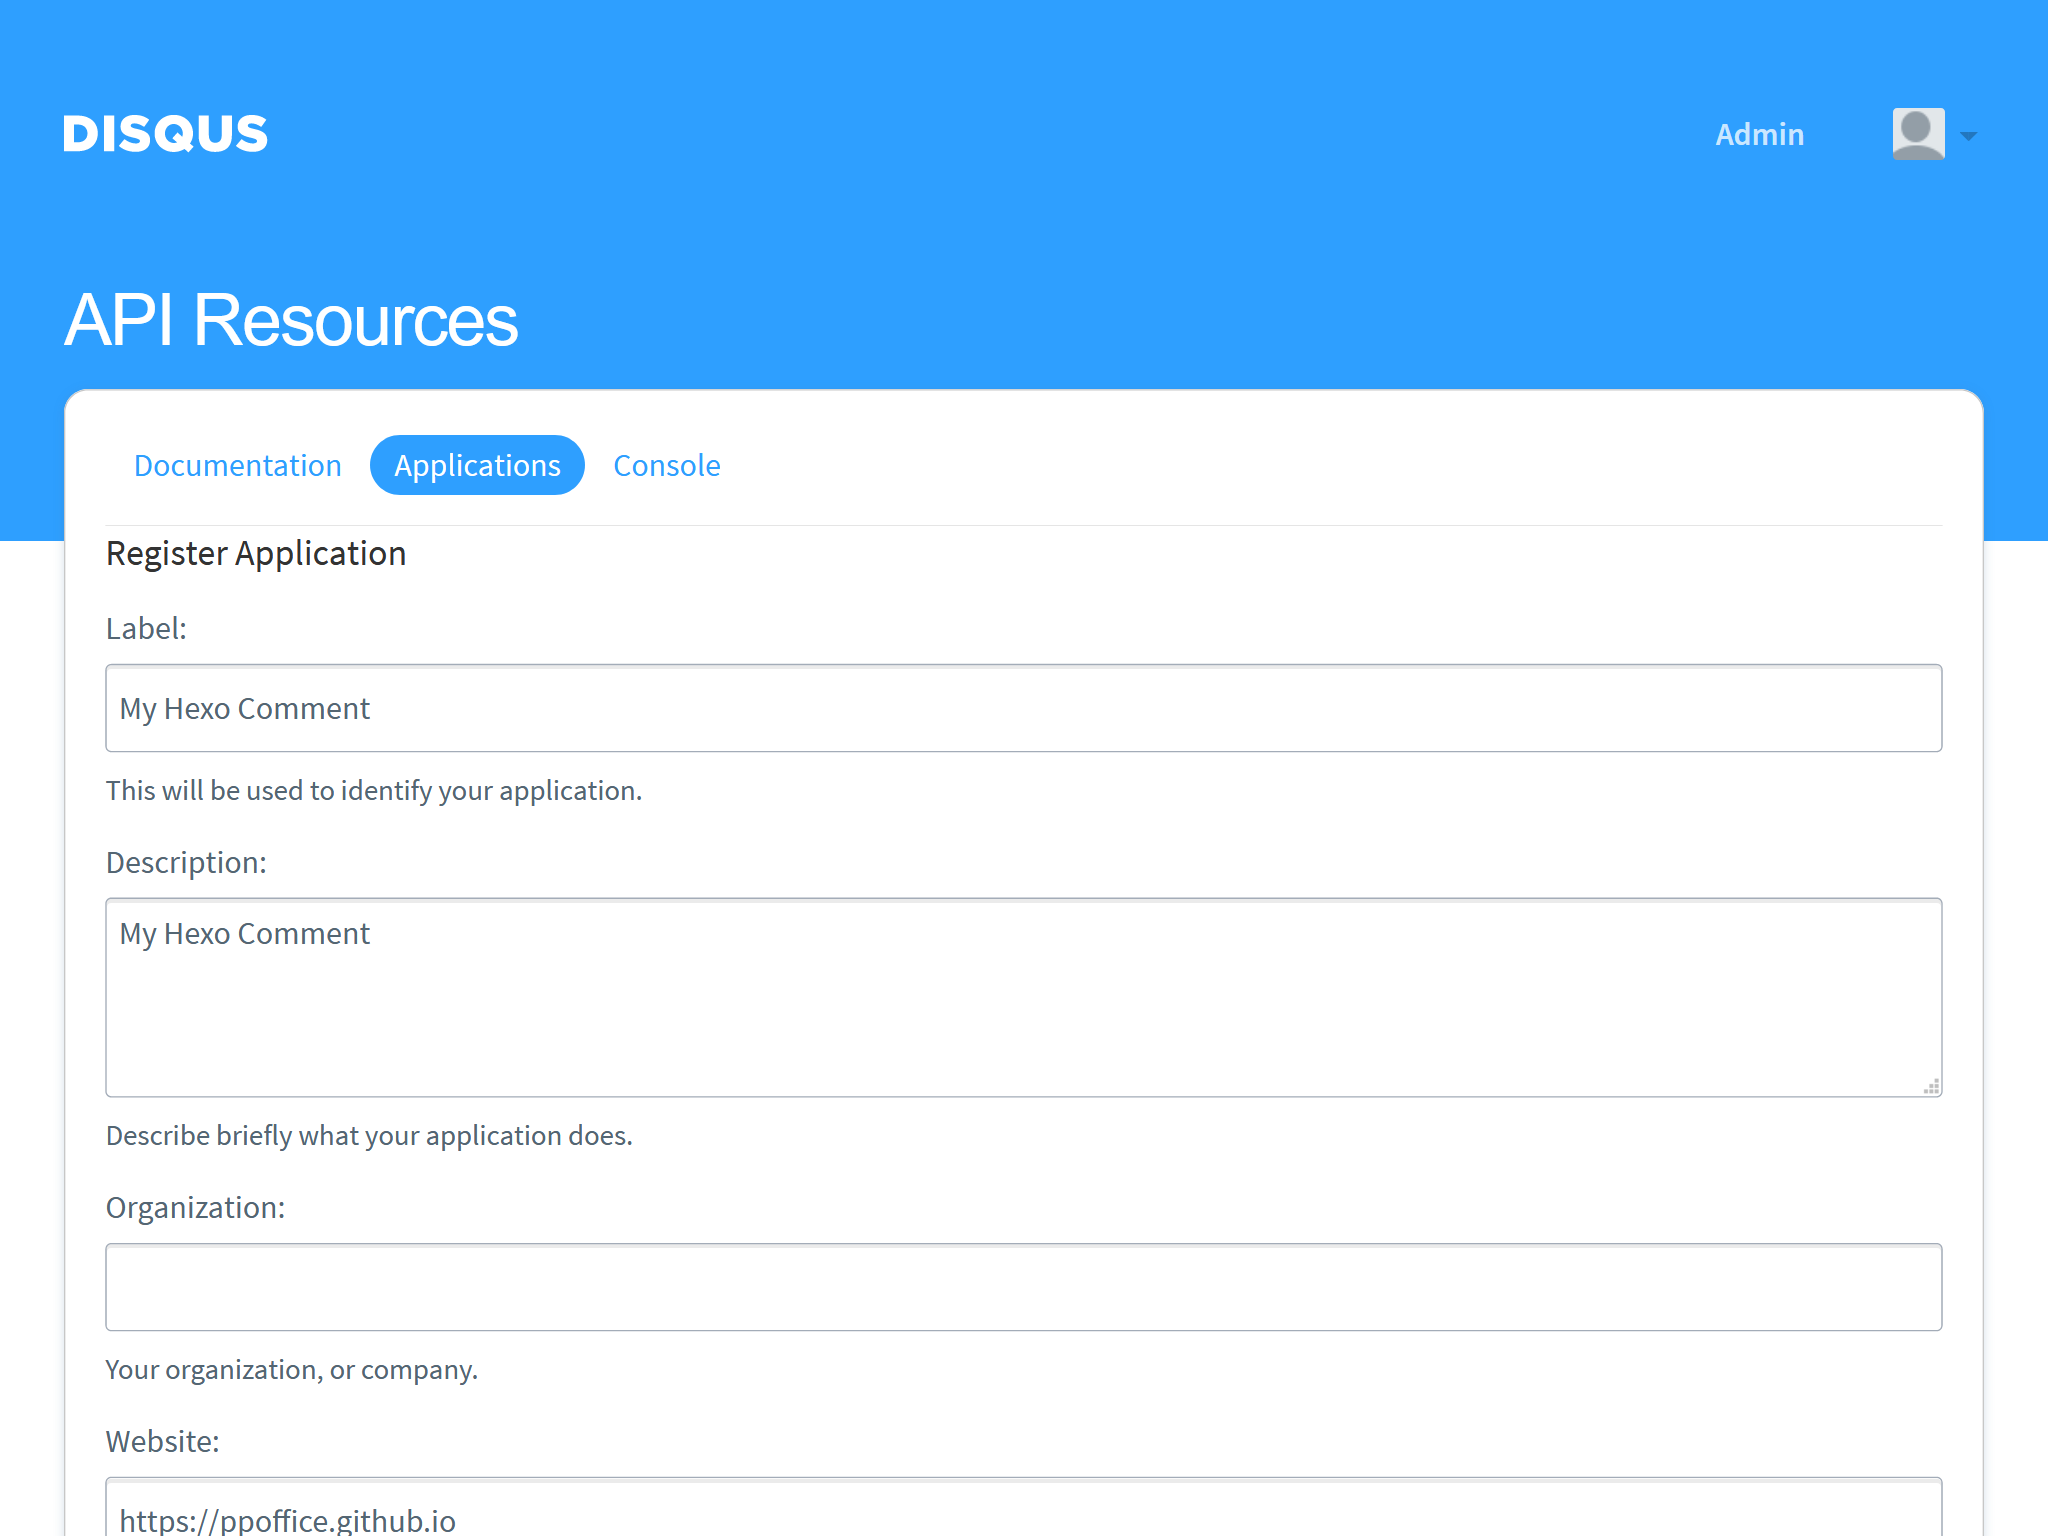
应用创建完毕后,进入应用的”设置“(Settings)界面,在”域名“(Domains)输入框中填入你Hexo站点的域名,例如ppoffice.github.io。
然后点击页面底部的“保存更改”(Save Changes)按钮。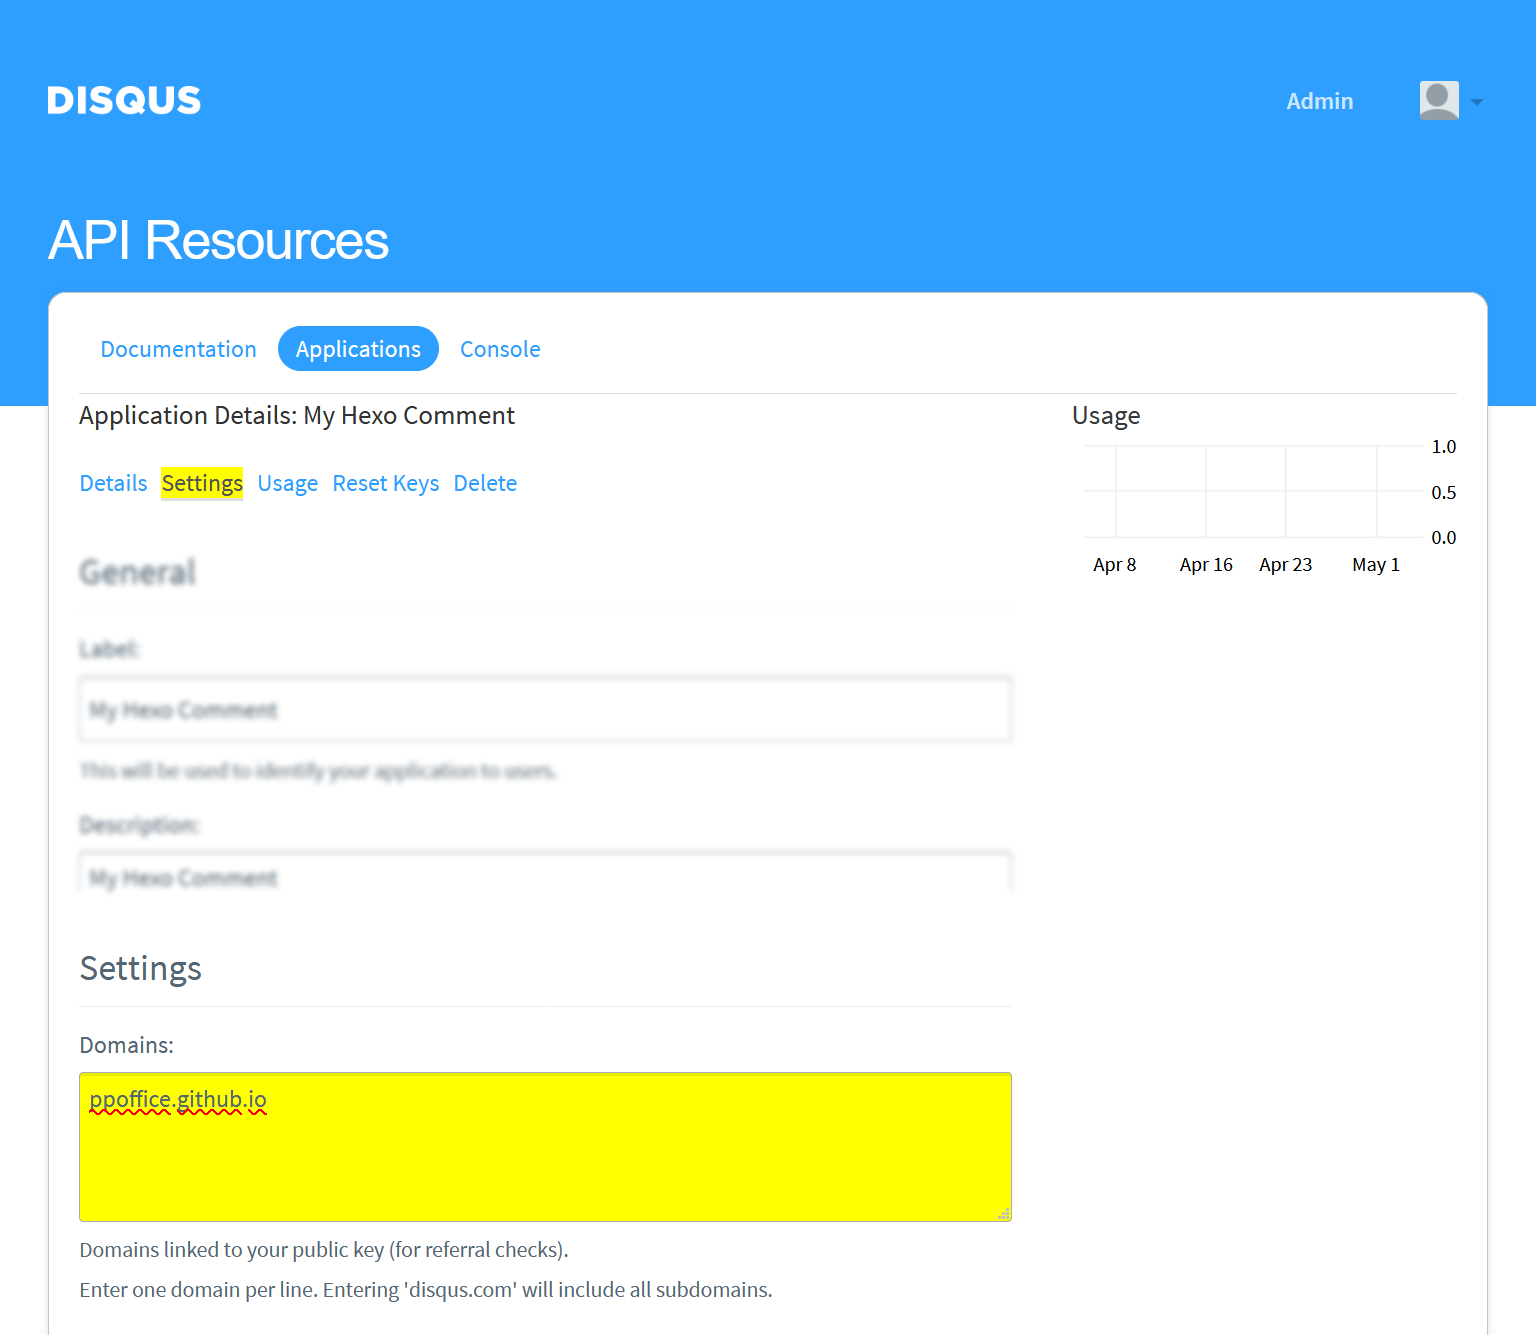
点击当前页面中的“详情”(Details)链接切换到当前应用的主页。
从”OAuth设置“(OAuth Settings)部分中复制”API Key“到相应的主题配置项中。例如,下面截图中的”API Key“:
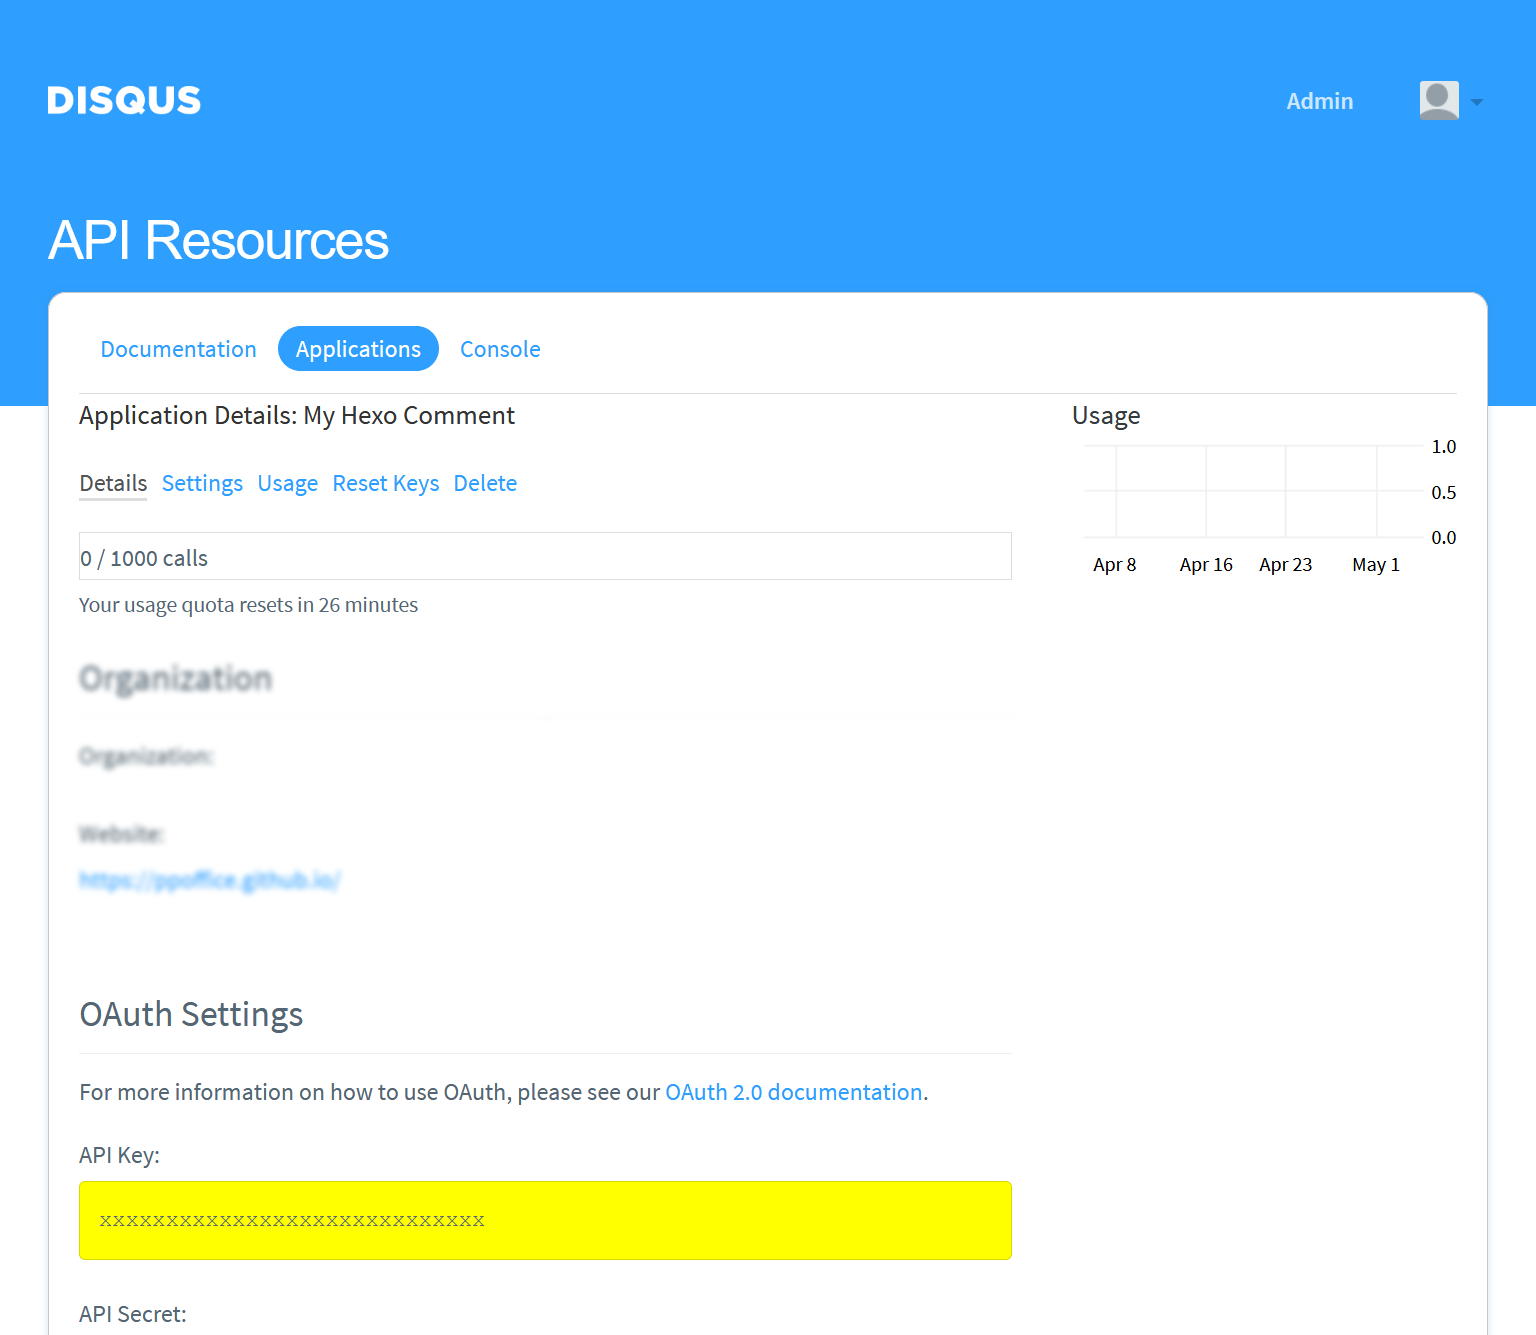
对应为下面的主题配置:
themes/icarus/_config.yml 1
2
3
4
5
6
7
8comment:
type: disqusjs
shortname: my-hexo-blog-1
api_key: xxxxxxxxxxxxxxxxxxxxxxxxxxxxx
api: https://disqus.skk.moe/disqus/ # 可选填
admin: ppoffice # 可选填
admin_label: Admin # 可选填
nesting: 4 # 可选填如要更多了解DisqusJS和它的配置,请访问SukkaW/DisqusJS文档或
hexo-component-inferno。
如要开启Facebook评论服务,将
comment的type设置为facebook即可。themes/icarus/_config.yml 1
2comment:
type: facebook
Gitalk
登录GitHub并点此注册一个新的OAuth应用。
填写”应用名称“(Application name),”应用主页“(Homepage URL),”应用描述“(Application description)。
然后,在”认证回调地址“(Authorization callback URL)填写你的博客的根URL地址。
点击“注册应用”(Register application)按钮来跳转到应用详情界面。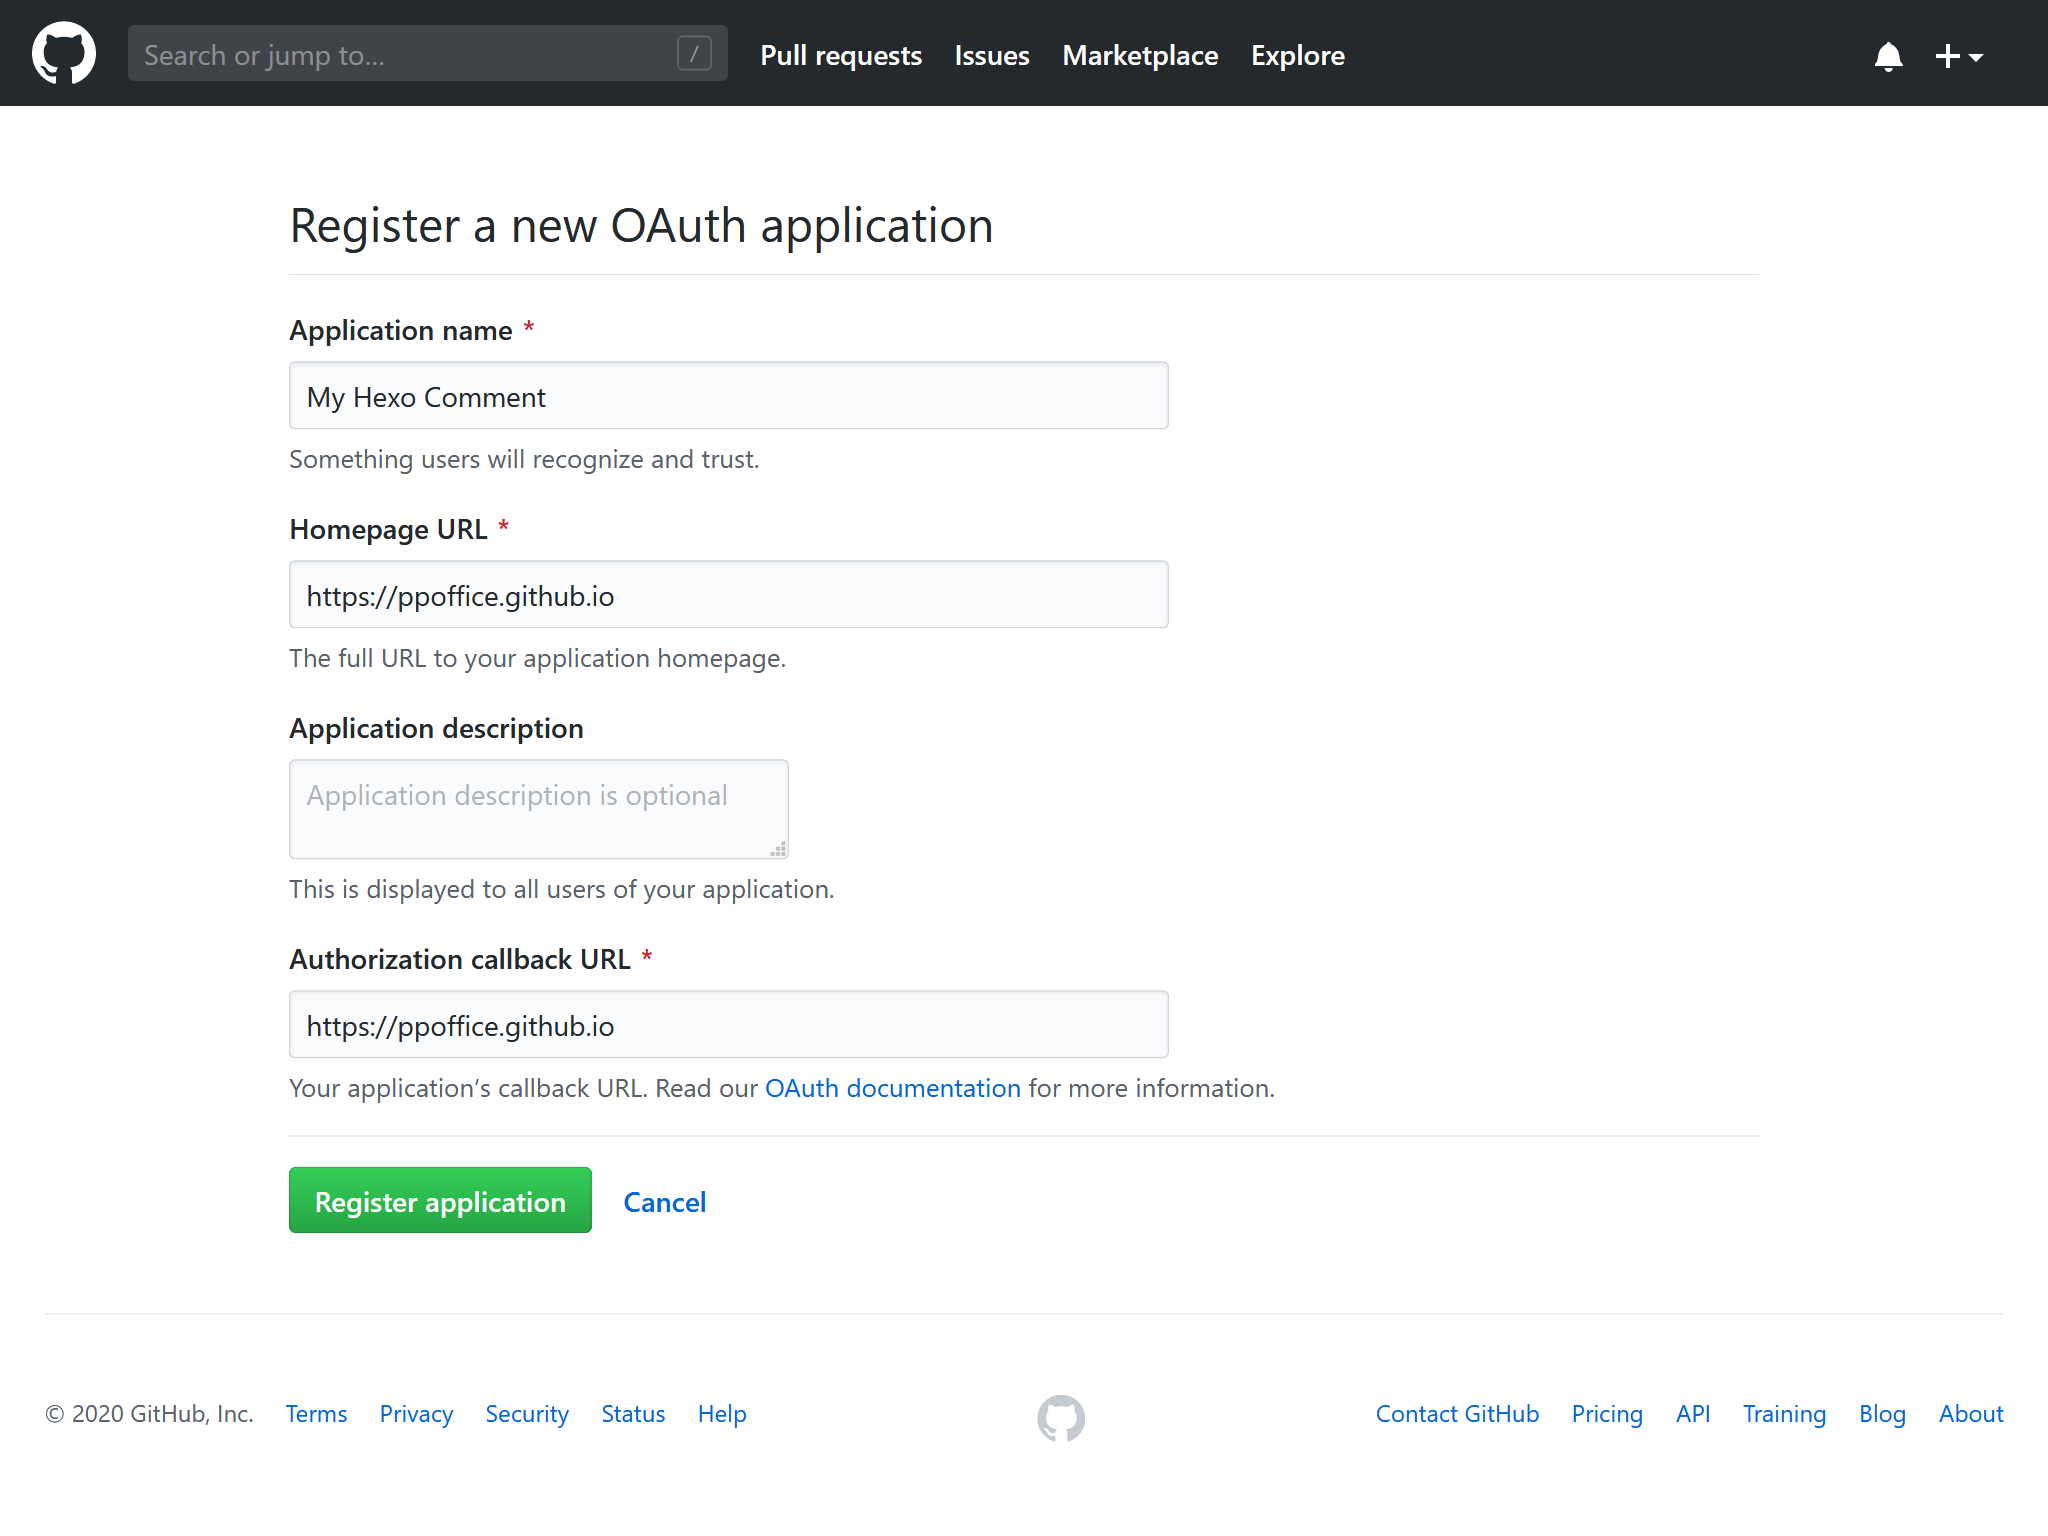
复制”Client ID“与”Client Secret“的值并填入主题配置的相应配置项中。
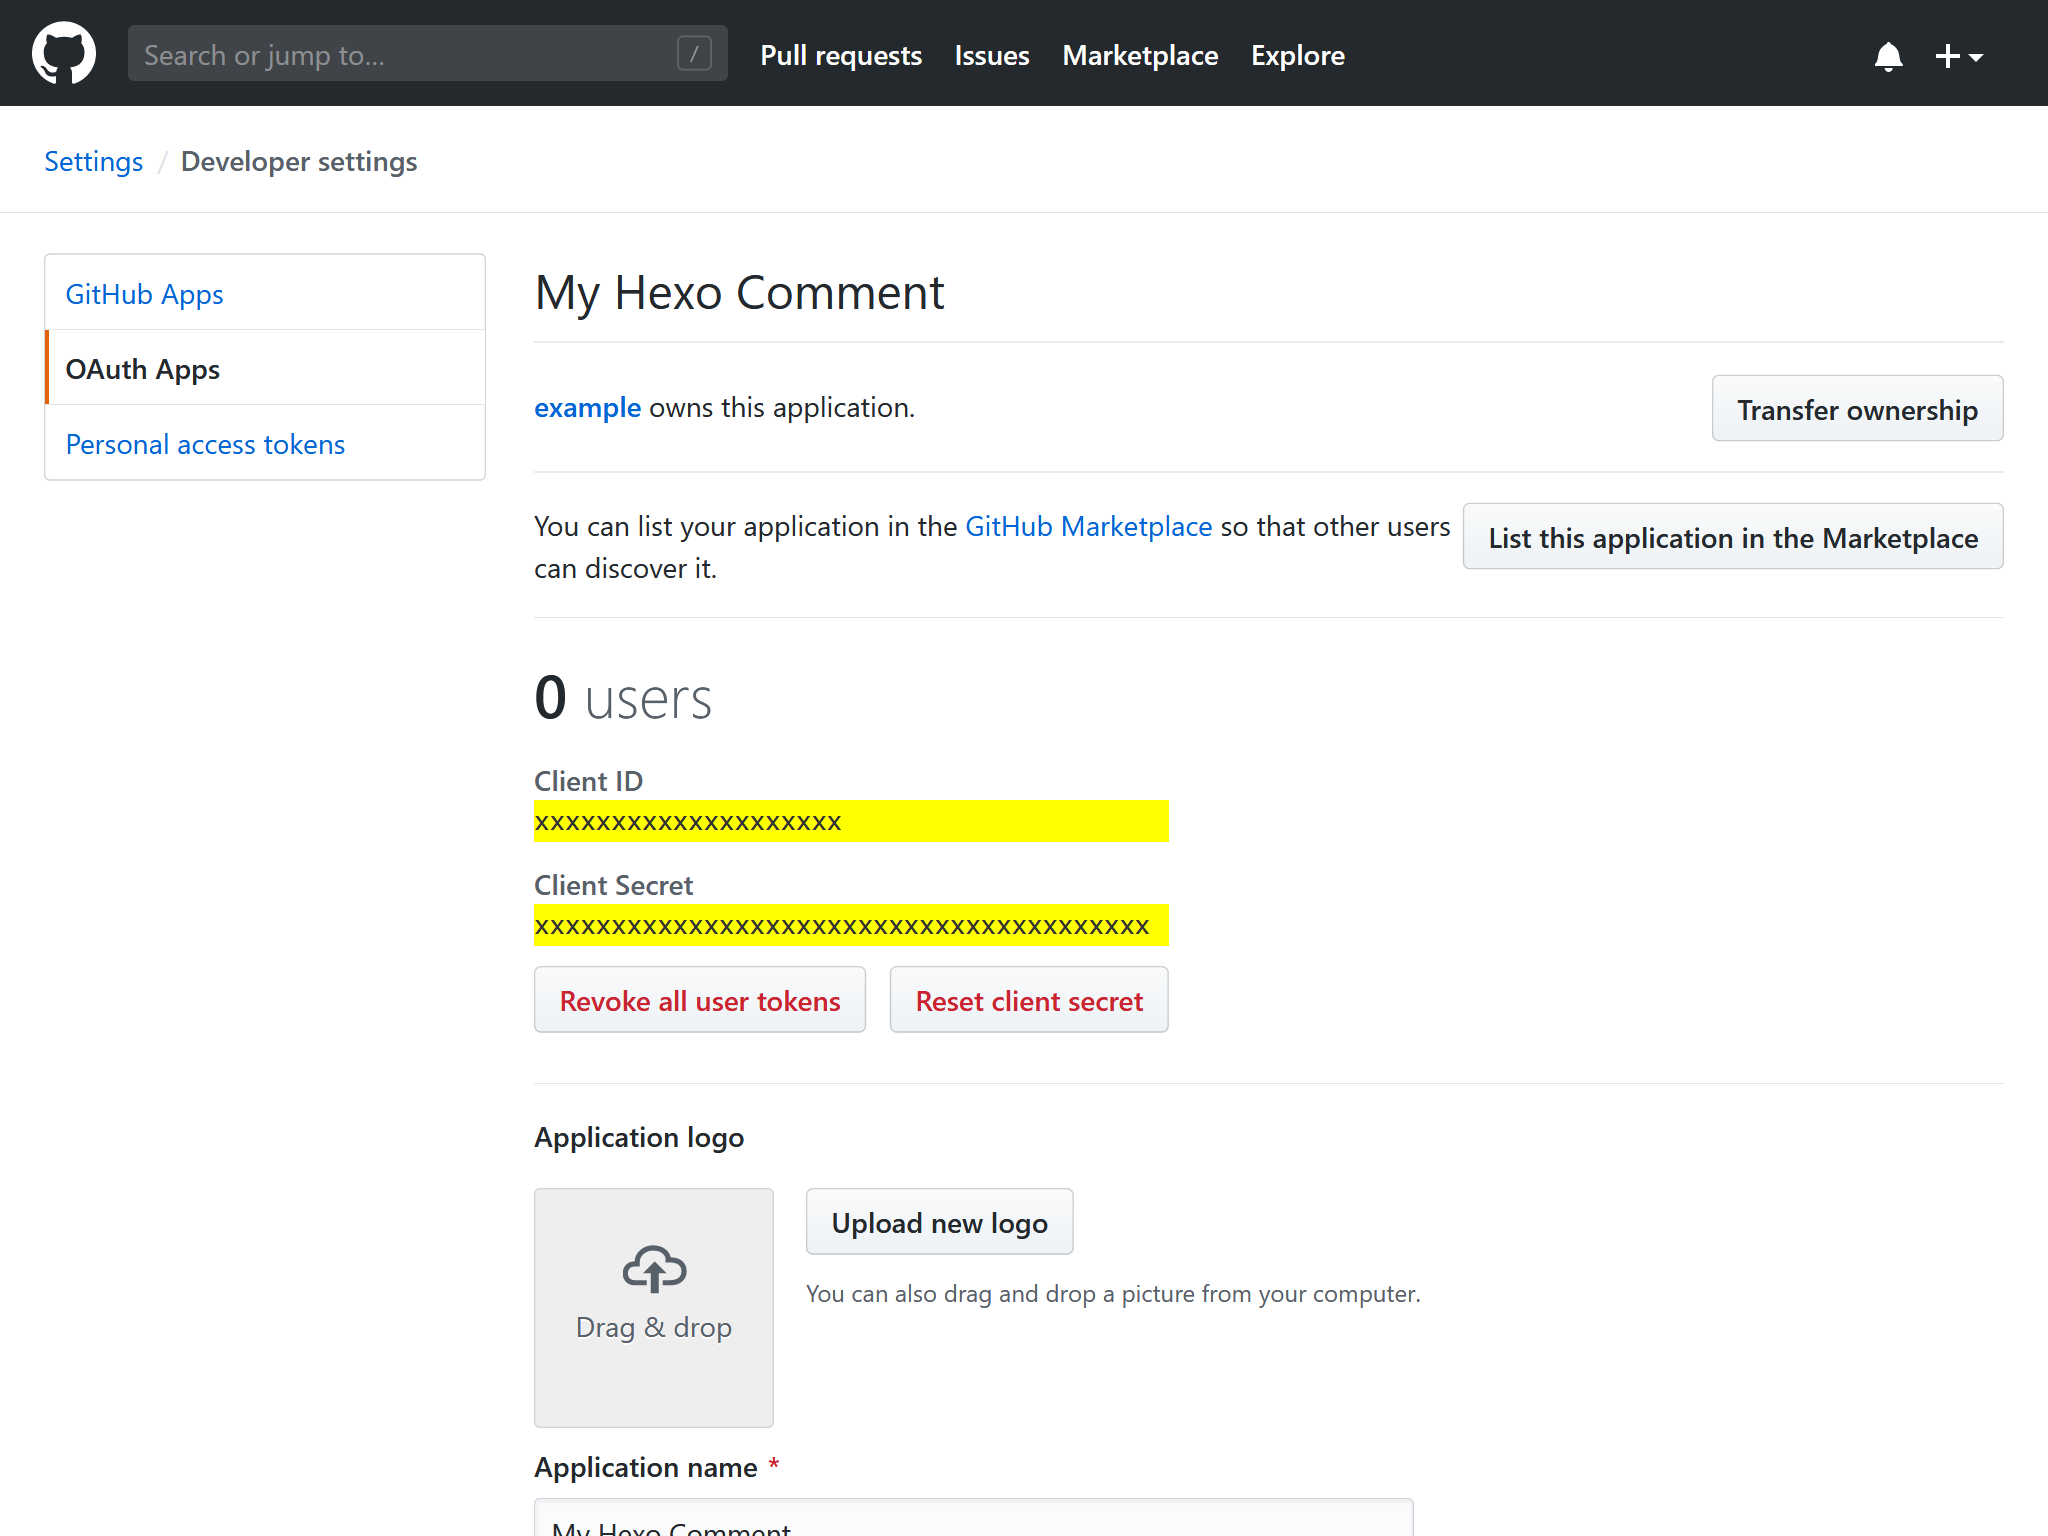
例如,对于下面的”Client ID“和”Client Secret“:
GitHub OAuth应用 1
2
3
4Client ID
xxxxxxxxxxxxxxxxxxxx
Client Secret
xxxxxxxxxxxxxxxxxxxxxxxxxxxxxxxxxxxxxxxx对应如下的Gitalk的配置:
themes/icarus/_config.yml 1
2
3
4
5
6
7
8
9
10
11
12
13
14
15comment:
type: gitalk
client_id: xxxxxxxxxxxxxxxxxxxx
client_secret: xxxxxxxxxxxxxxxxxxxxxxxxxxxxxxxxxxxxxxxx
repo: Some-of-Your-GitHub-Repo
owner: you_github_name
admin:
- you_github_name
per_page: 20 # 可选填
distraction_free_mode: false # 可选填
pager_direction: last # 可选填
create_issue_manually: false # 可选填
proxy: # 可选填
flip_move_options: # 可选填
enable_hotkey: true # 可选填关于上述配置的含义和可选值,请参考Gitalk文档或
hexo-component-inferno。
Gitment
安装指南
参照Gitalk中的步骤注册GitHub OAuth应用。
复制”Client ID“与”Client Secret“的值到主题配置的相应配置项中。
下面是Gitment的示例配置:
themes/icarus/_config.yml 1
2
3
4
5
6
7
8
9comment:
type: gitment
owner: you_github_name
repo: Some-of-Your-GitHub-Repo
client_id: xxxxxxxxxxxxxxxxxxxx
client_secret: xxxxxxxxxxxxxxxxxxxxxxxxxxxxxxxxxxxxxxxx
theme: gitment.defaultTheme # 可选填
per_page: 20 # 可选填
max_comment_height: 250 # 可选填关于上述配置的含义,请参考Gitment文档或
hexo-component-inferno。
Isso
如果你希望自己搭建一个评论系统而不是依赖第三方的评论服务时,Isso是一个可行的选择。
然而,不同于第三方评论系统,你需要准备一个Web服务器用来运行Isso服务端程序。
安装指南
请参照Isso文档安装并启动Isso服务器。
将Isso服务器的HTTP URL填入到主题配置的相应配置项中。
例如,如果你的Isso服务地址为https://posativ.org/isso/api/,你会有如下的评论配置:themes/icarus/_config.yml 1
2
3comment:
type: isso
url: posativ.org/isso/api
LiveRe
首先,登录LiveRe。
点击导航栏上的“安装”(Install)链接,进入安装界面。选择免费”City“选项下方的“现在安装”(Install Now)按钮。
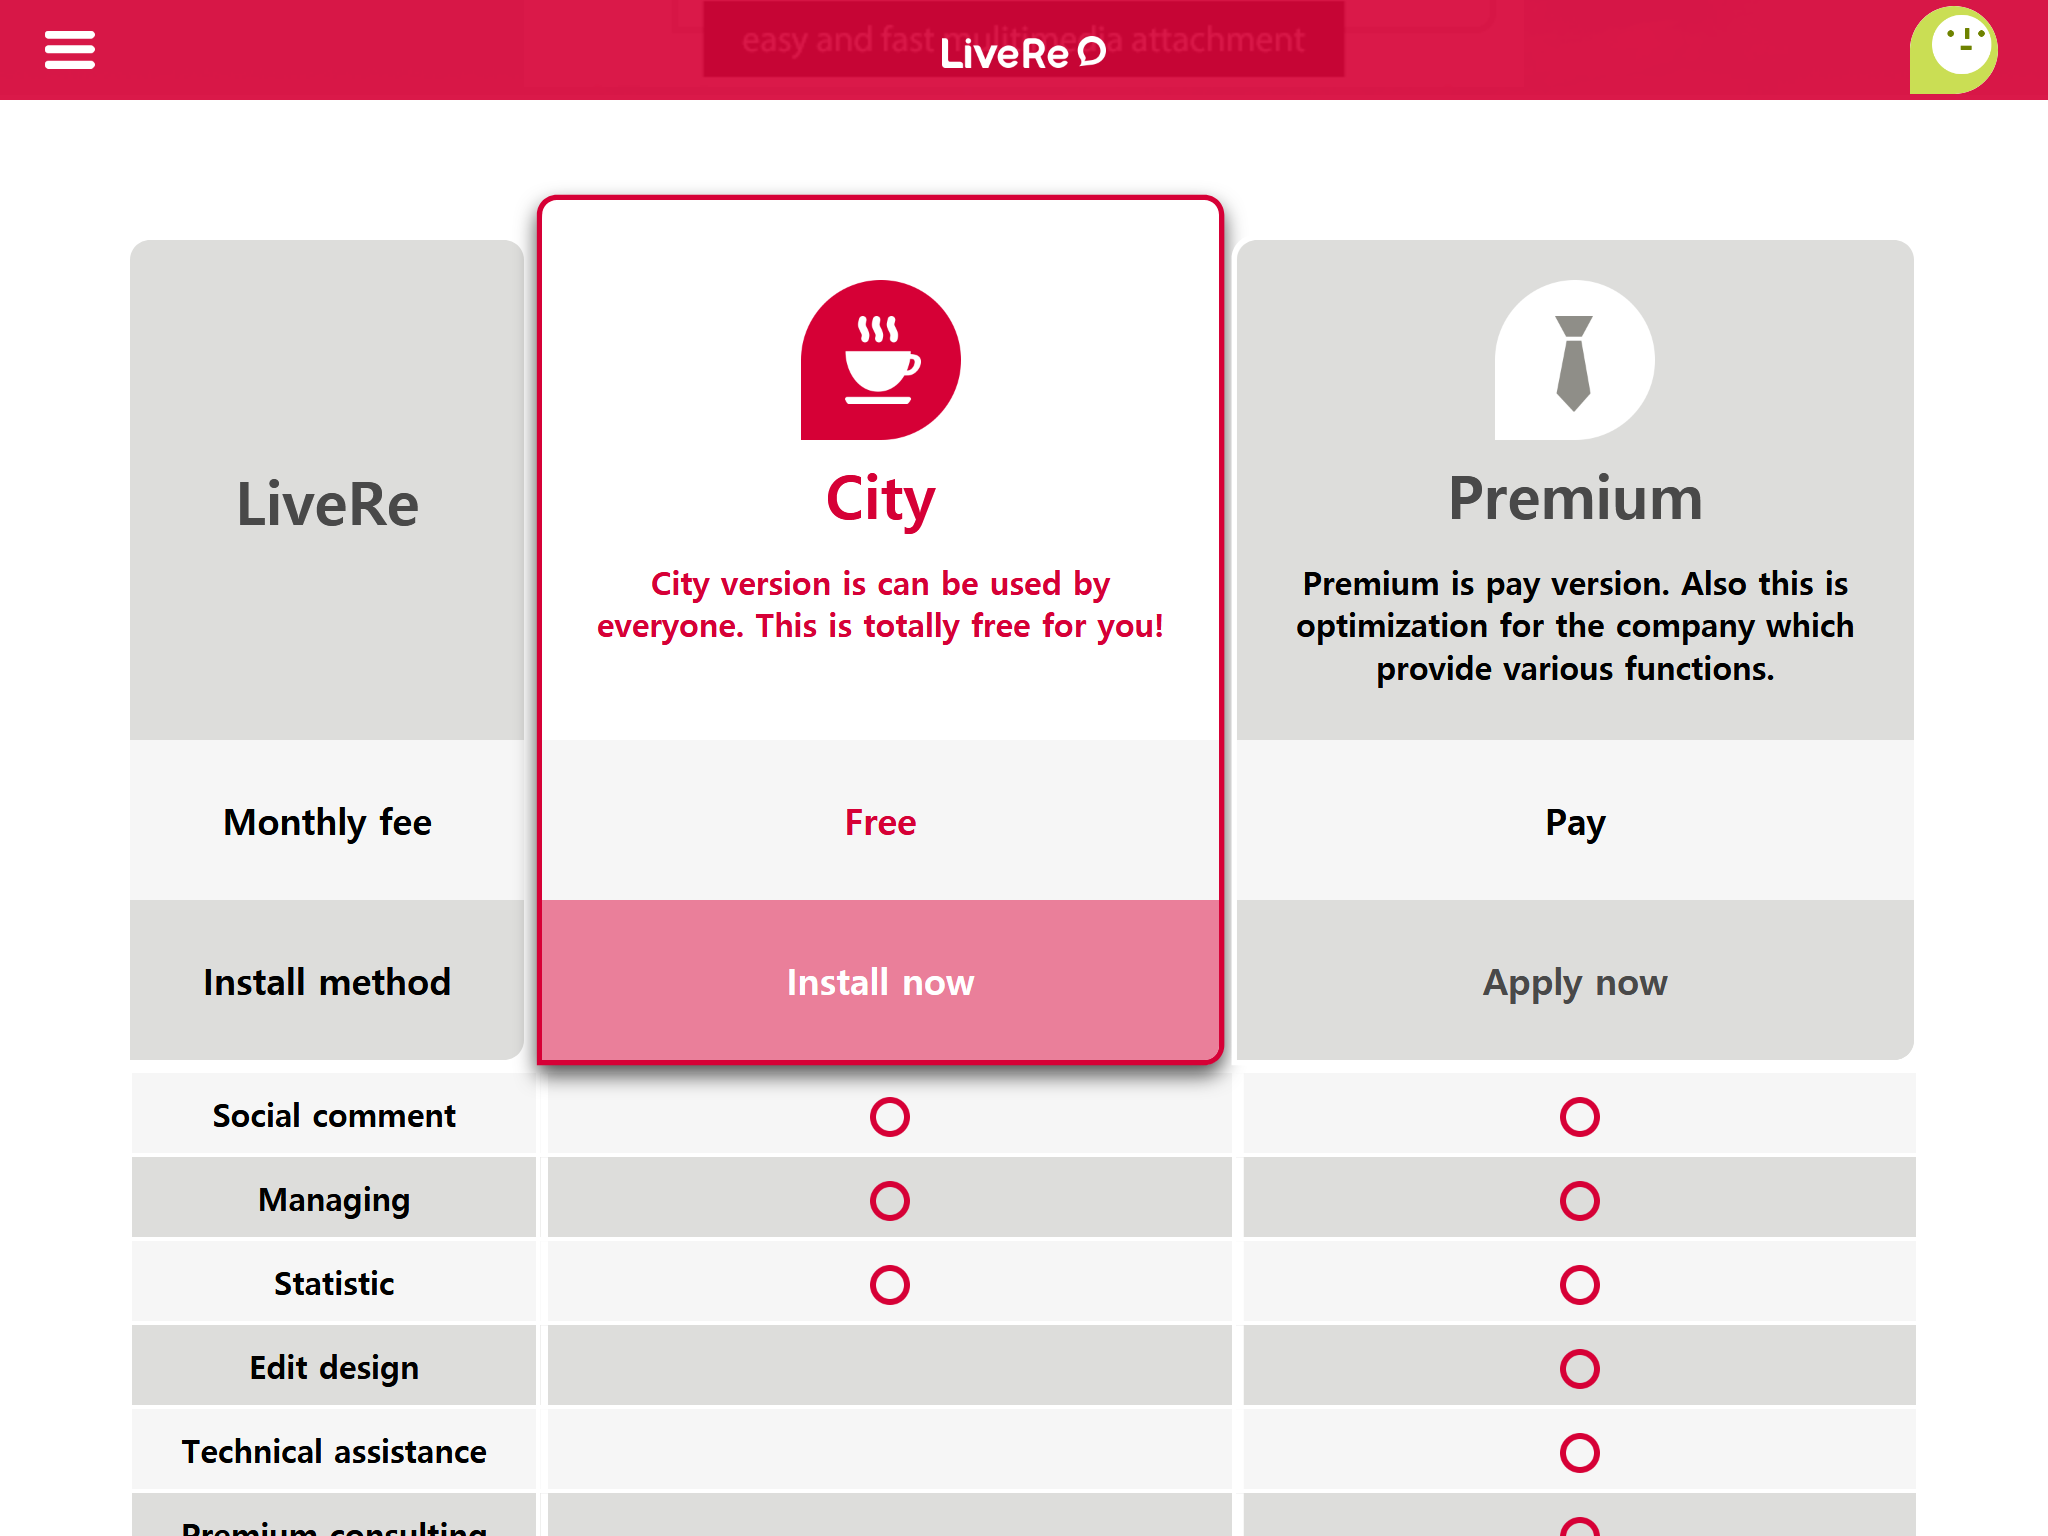
在”获取LiveRe City代码“(Get LiveRe City code)页面填写”站点地址“(Site URL),”网站名称“(Name of website),
和”网站类别“(Choose site category)。
勾选“同意广告协议”(I have check the advertising terms…)并点击”获取代码“(Get code)按钮来跳转到LiveRe HTML代码页面。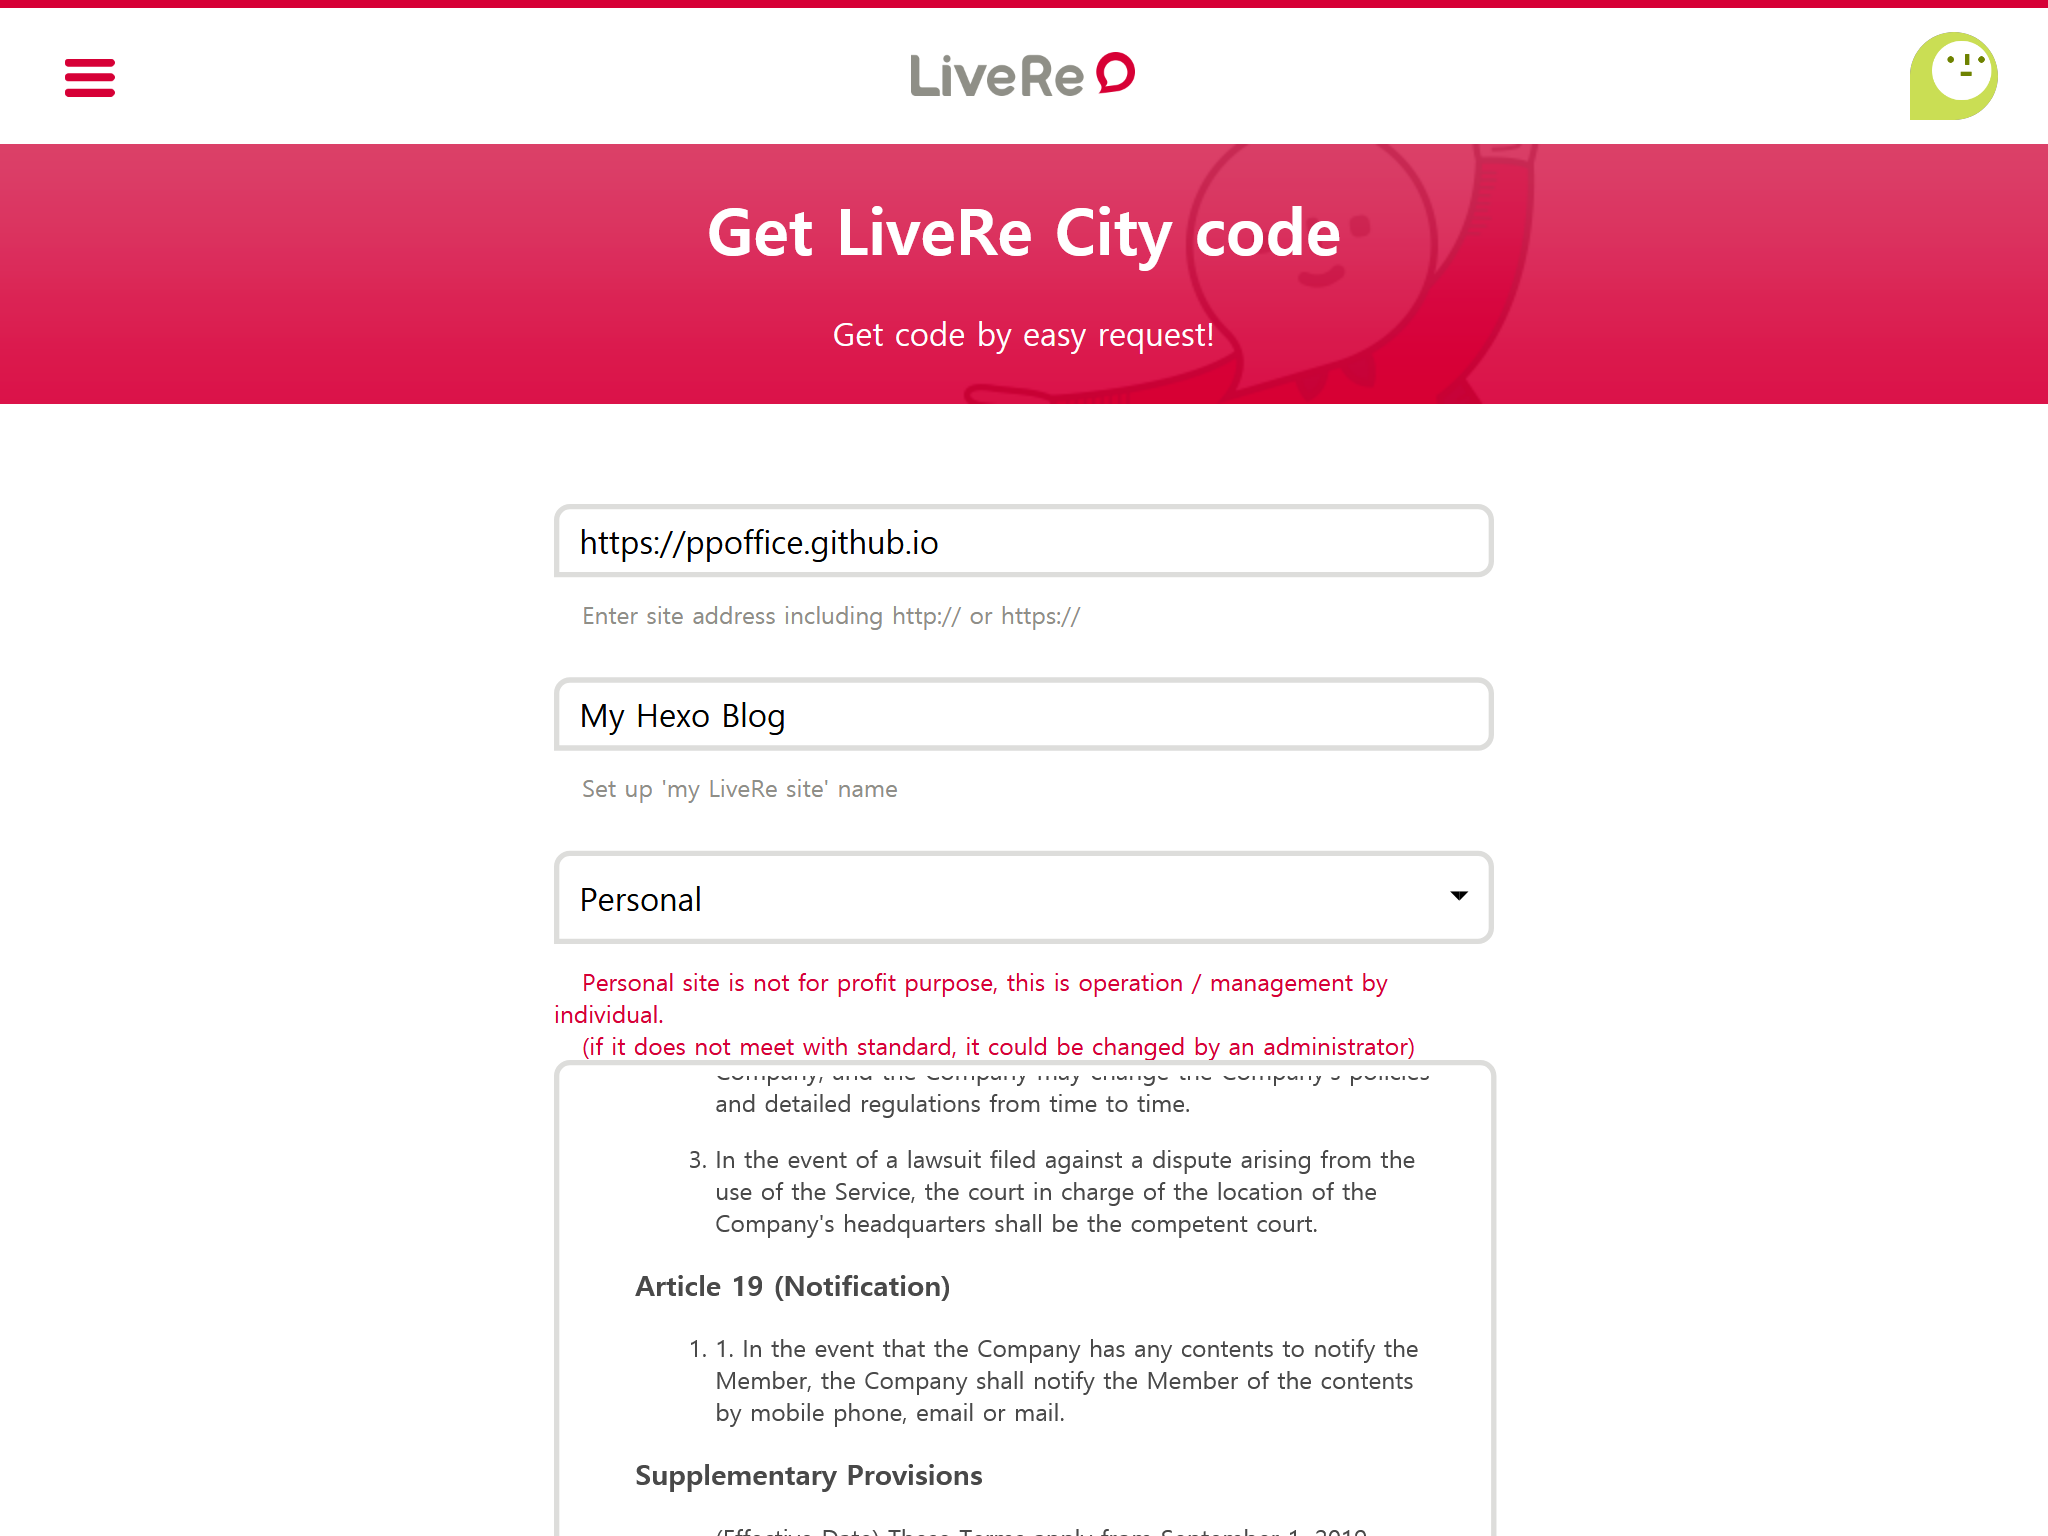
复制
data-uid="..."引号内的值到主题配置中的相应配置项中。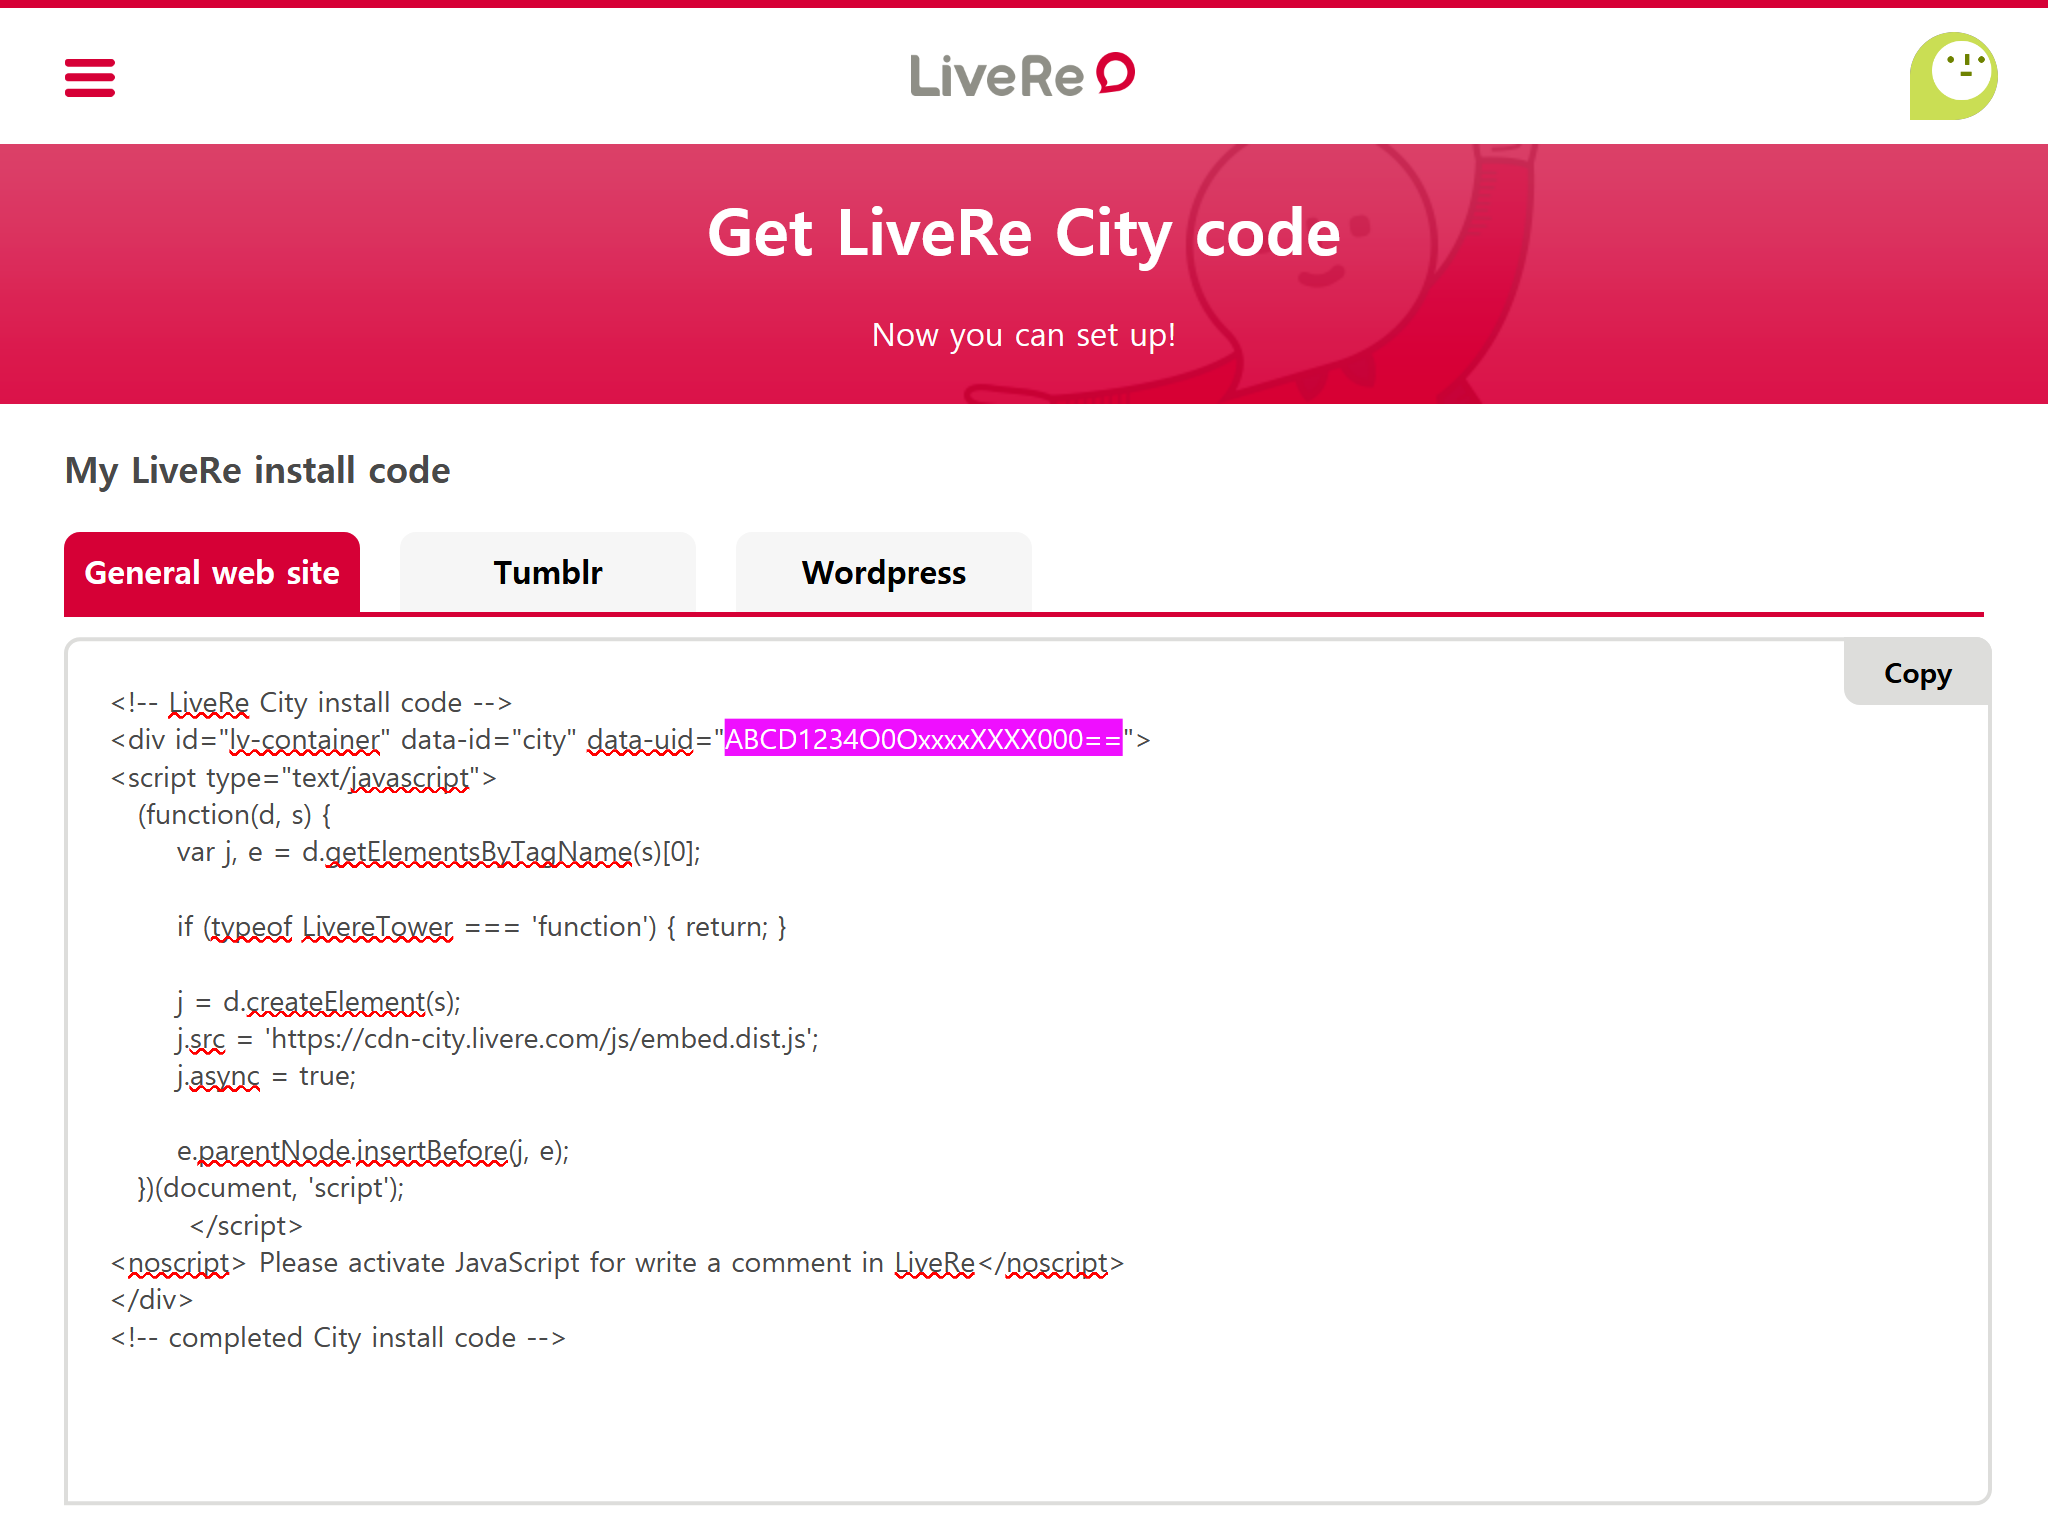
例如,下方的LiveRe代码:
LiveRe安装代码 >folded 1
2
3
4
5
6
7
8
9
10
11
12
13
14
15
16
17
18<!-- LiveRe City install code -->
<div id="lv-container" data-id="city" data-uid="ABCD1234O0OxxxxXXXX000==">
<script type="text/javascript">
(function(d, s) {
var j, e = d.getElementsByTagName(s)[0];
if (typeof LivereTower === 'function') { return; }
j = d.createElement(s);
j.src = 'https://cdn-city.livere.com/js/embed.dist.js';
j.async = true;
e.parentNode.insertBefore(j, e);
})(document, 'script');
</script>
<noscript> Please activate JavaScript for write a comment in LiveRe</noscript>
</div>
<!-- completed City install code -->对应的主题配置为:
themes/icarus/_config.yml 1
2
3comment:
type: livere
uid: ABCD1234O0OxxxxXXXX000==
utterances
准备一个公开的GitHub仓库(Repository)。
访问GitHub Apps - utterances并点击”安装“(Install)。
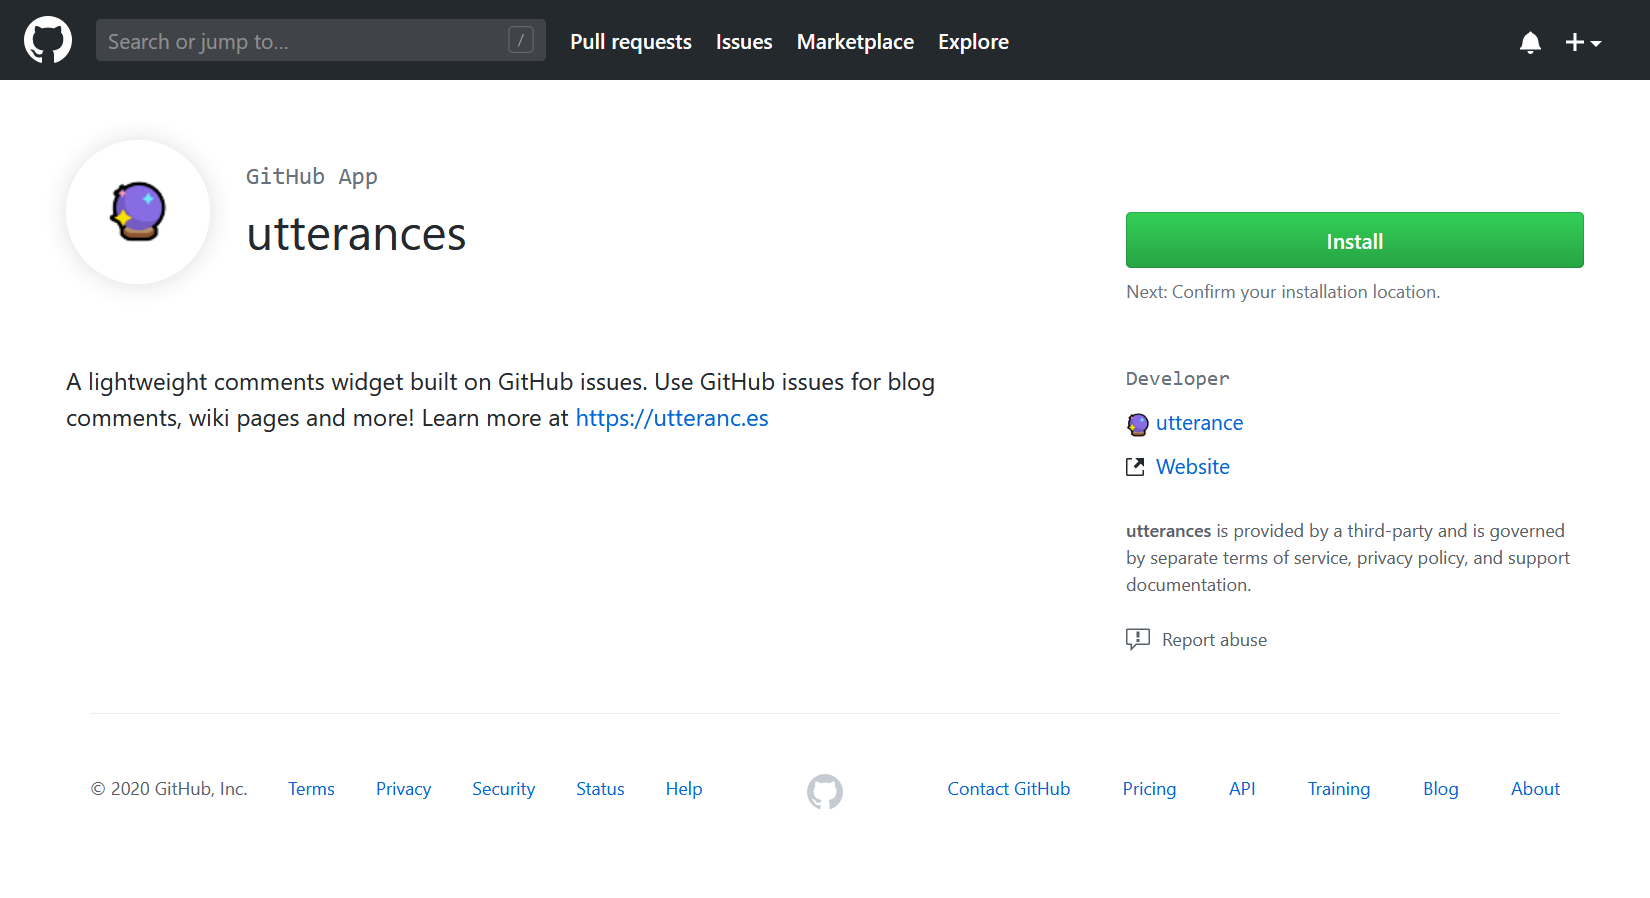
(可选)如果你的账号下有组织账号,在下一页中选择需要安装utterances的用户。
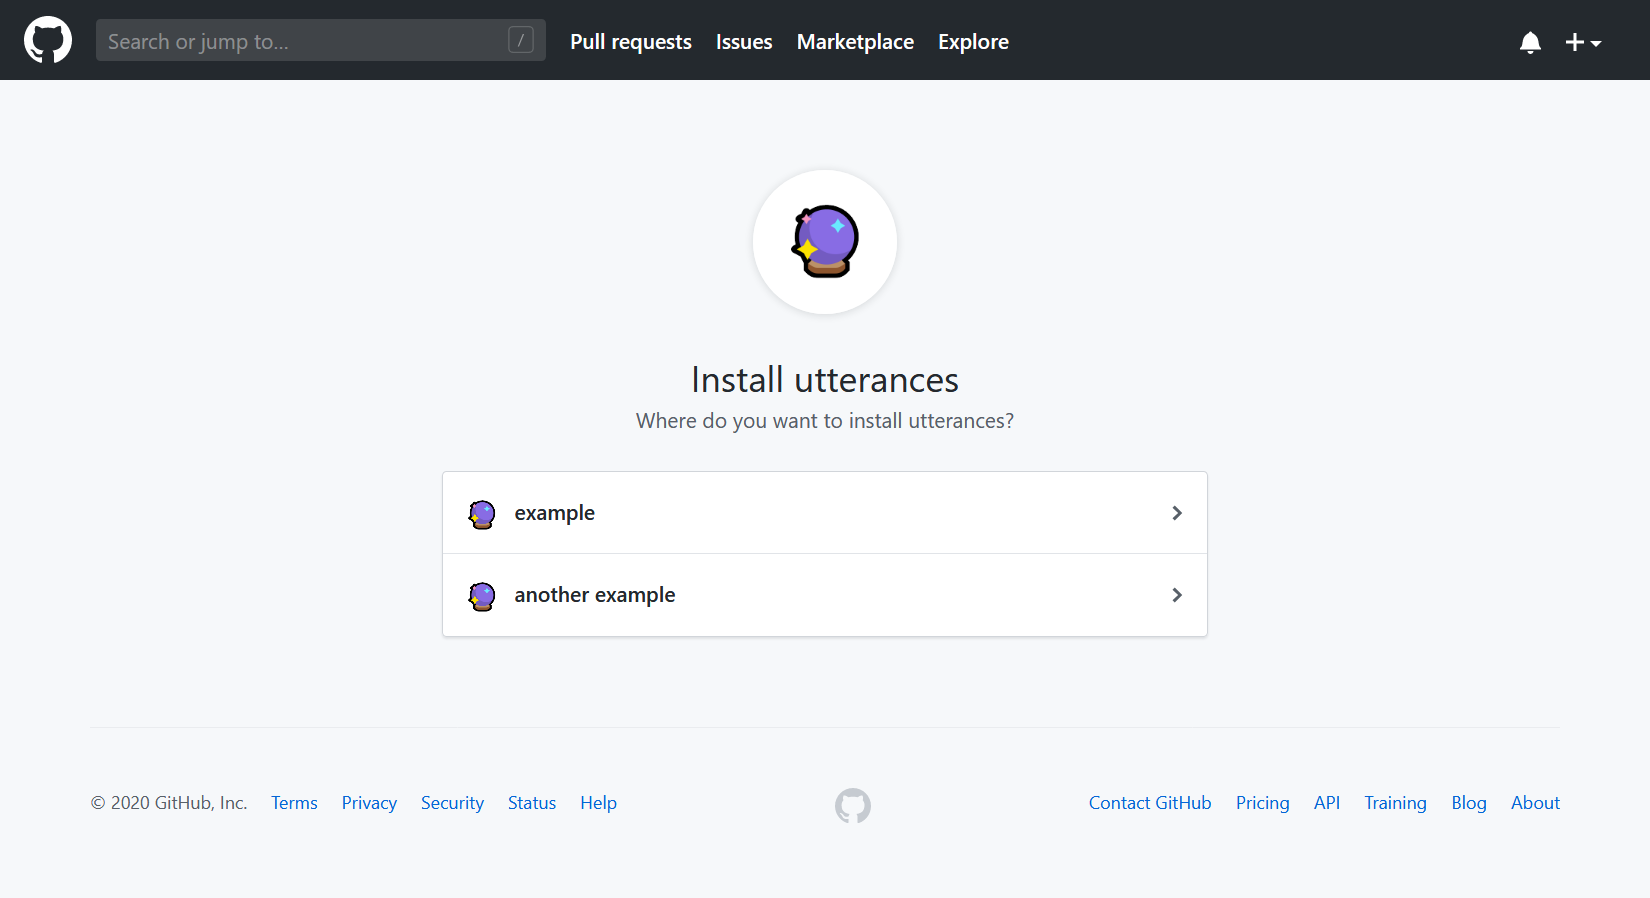
在下一页面选择将utterances安装到”所有仓库“(All repositories)或是”选定的仓库“(Only select repositories)。
然后点击“安装”(Install)按钮。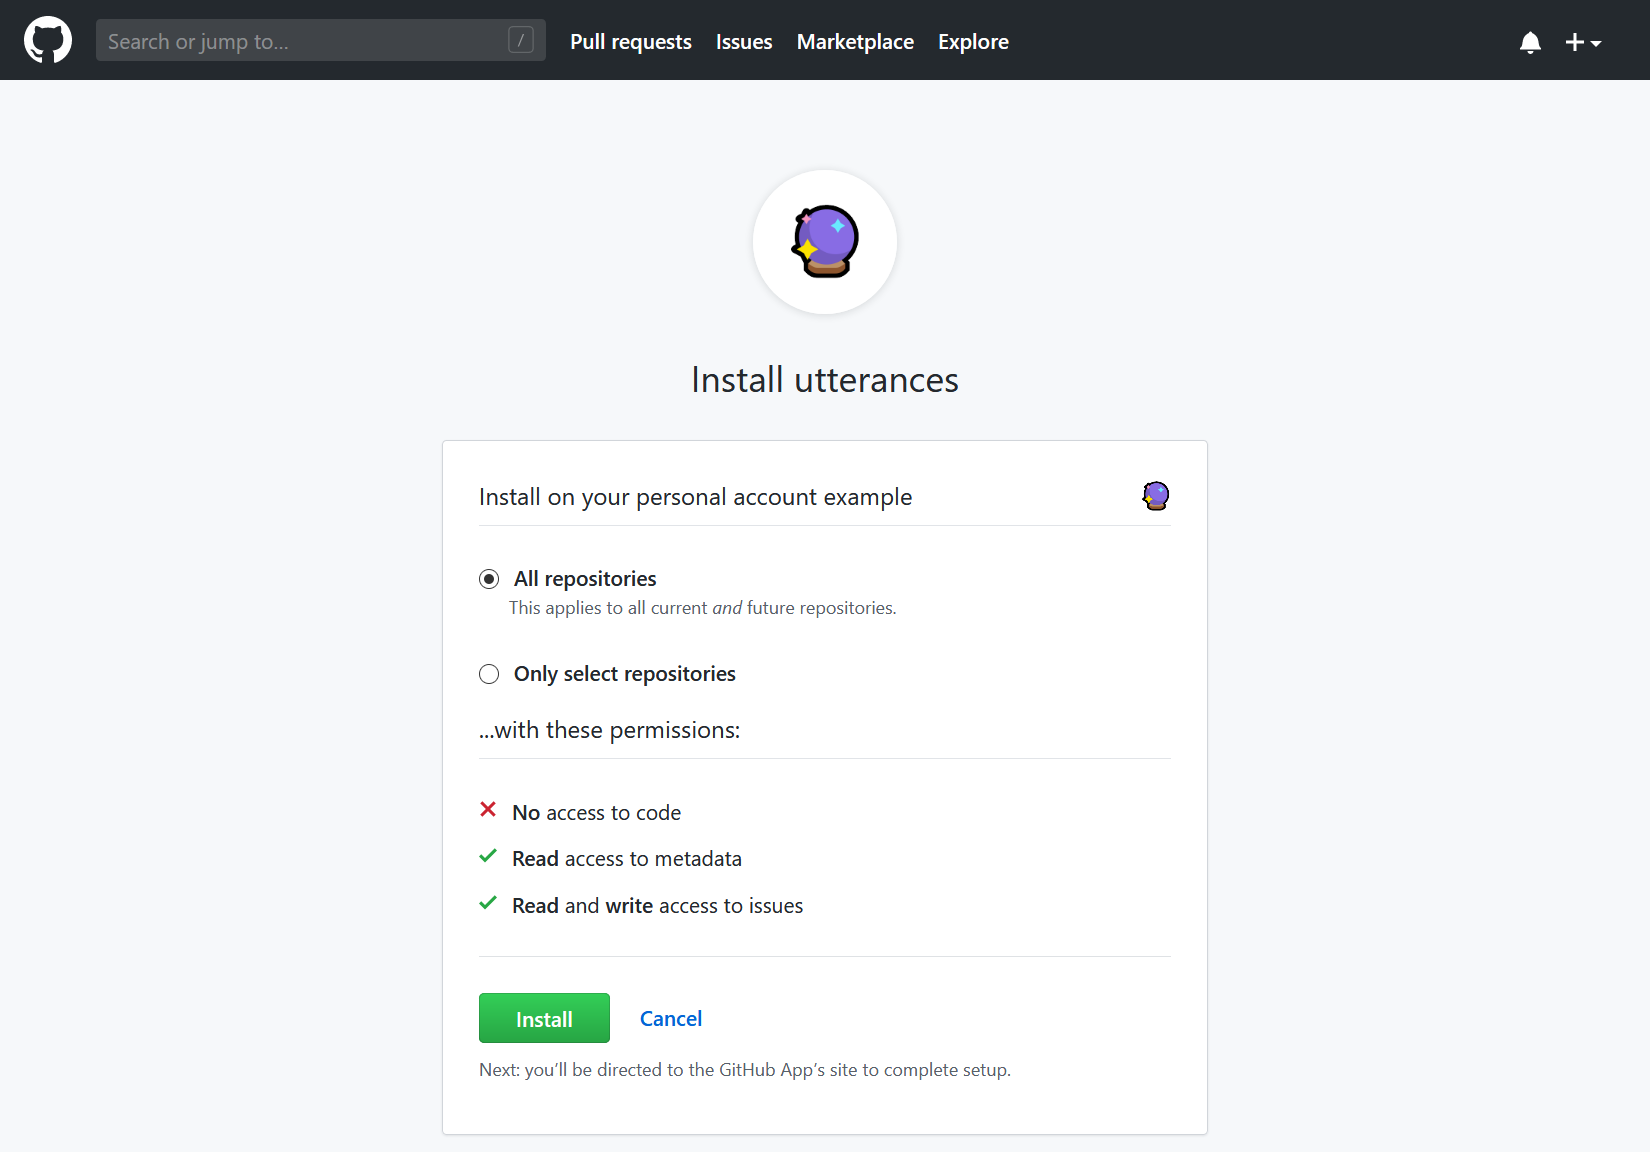
若安装成功,网页将跳转到utterances官网。
你可以阅读每个的配置项的说明,并按照配置你的utterances安装。完成配置后,转到页面上的”开启utterances“(Enable Utterances)并从utterances的HTML代码中复制属性值到主题配置的对应配置项中。
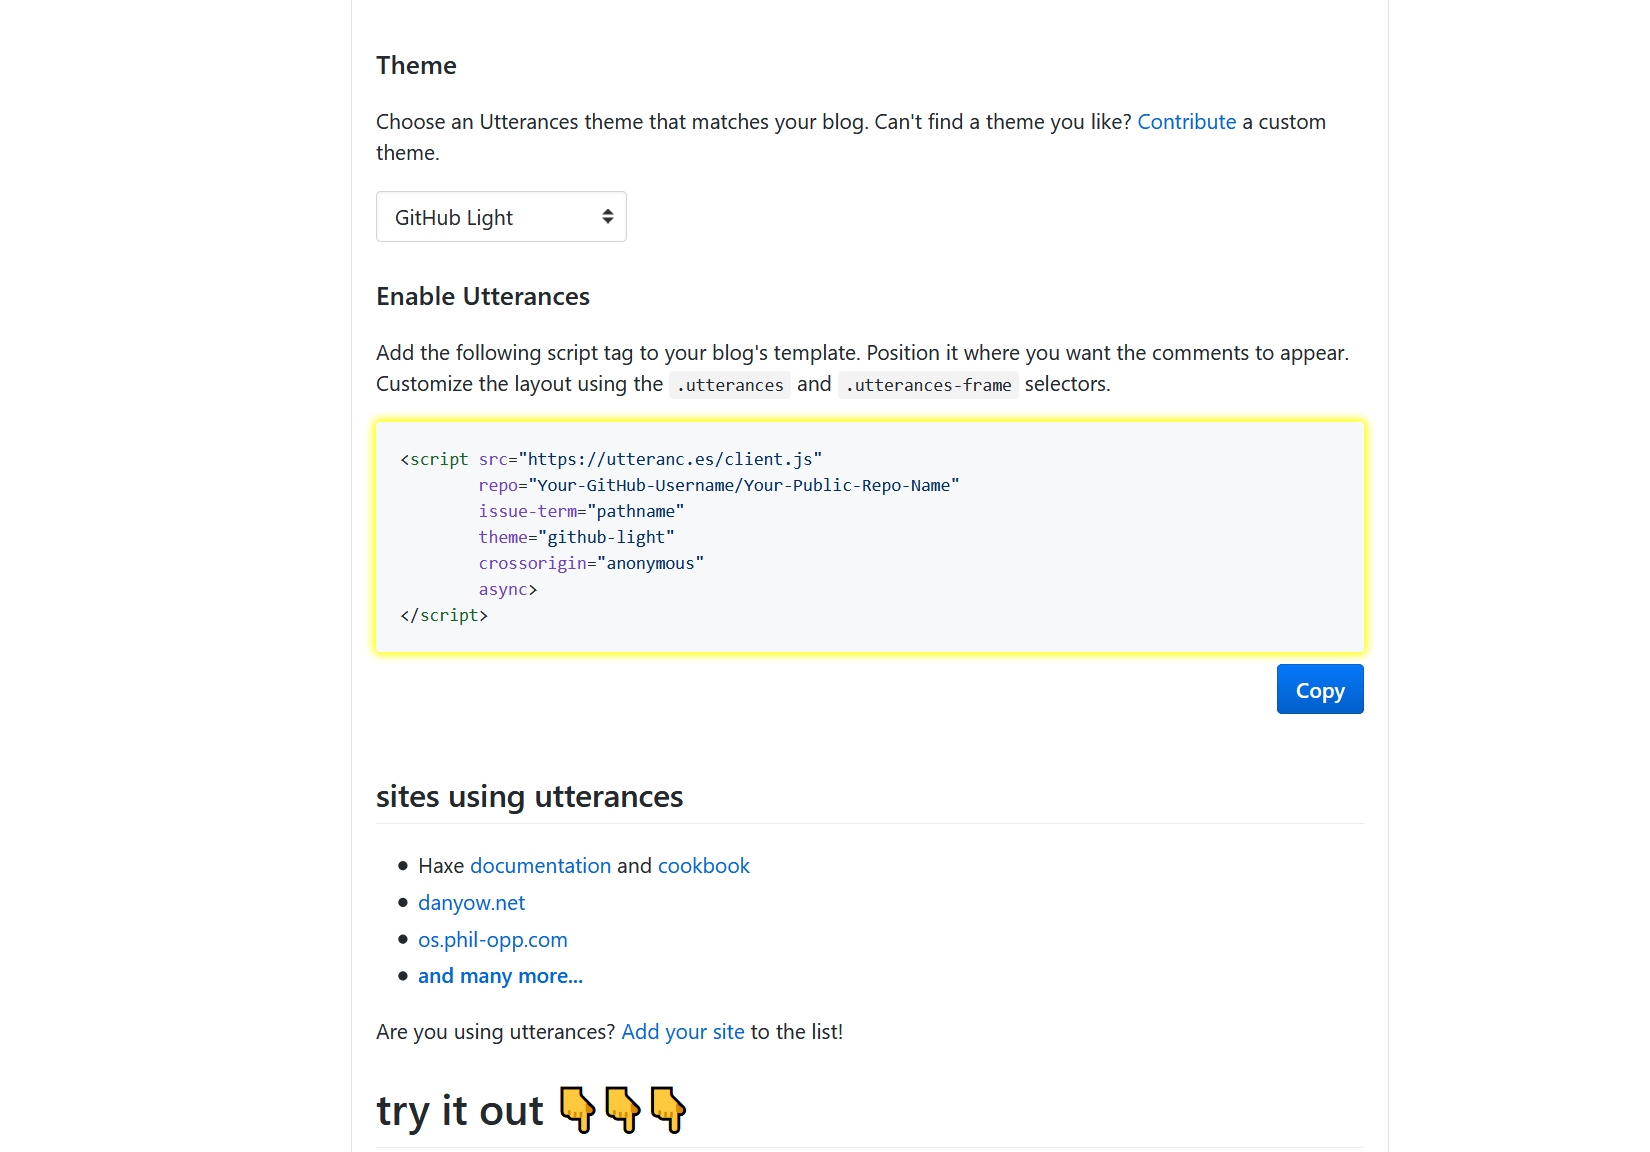
例如下面的utterances代码:
utterances安装代码 >folded 1
2
3
4
5
6
7<script src="https://utteranc.es/client.js"
repo="Your-GitHub-Username/Your-Public-Repo-Name"
issue-term="pathname"
theme="github-light"
crossorigin="anonymous"
async>
</script>对应下面的主题配置:
themes/icarus/_config.yml 1
2
3
4
5
6
7comment:
type: utterances
repo: Your-GitHub-Username/Your-Public-Repo-Name
issue_term: pathname # 必填项,与issue_number二选一填写
issue_number: 100 # 必填项,与issue_term二选一填写,每篇文章对应一个issue,填写前需要手动创建issue
label: some-issue-label # 可选填
theme: github-light # 可选填
Valine
按照快速开始文档创建LeanCloud应用。
将你LeanCloud应用的”App ID“和”App Key“复制到主题配置的对应配置项中。
此外,你可以参考配置项来了解可选配置项的详情和可能的配置值。
下面是示例配置:themes/icarus/_config.yml 1
2
3
4
5
6
7
8
9
10
11
12
13
14
15
16
17
18comment:
type: valine
app_id: xxxxxxxxxxxxxxxxxxxxxxxxxxxxxxxxxxxxx
app_key: xxxxxxxxxxxxxxxxxxxxxx
placeholder: "" # 可选填
avatar: mm # 可选填
avatar_force: false # 可选填
meta: ["nick", "mail", "link"] # 可选填
page_size: 10 # 可选填
lang: zh-CN # 可选填
visitor: false # 可选填
highlight: true # 可选填
record_ip: false # 可选填
server_urls: # 可选填
emoji_cdn: # 可选填
emoji_maps: # 可选填
enable_qq: false # 可选填
required_fields: [] # 可选填
参考文章:
参考链接
- 本文标题:Hexo博客指南|第八篇:Icarus配置 - 用户评论插件
- 本文作者:Ji2xpro
- 本文链接:https://ji2xpro.github.io/a9423429/
- 版权声明:本博客所有文章除特别声明外,均采用 CC BY-NC-SA 4.0 许可协议。转载请注明出处!

